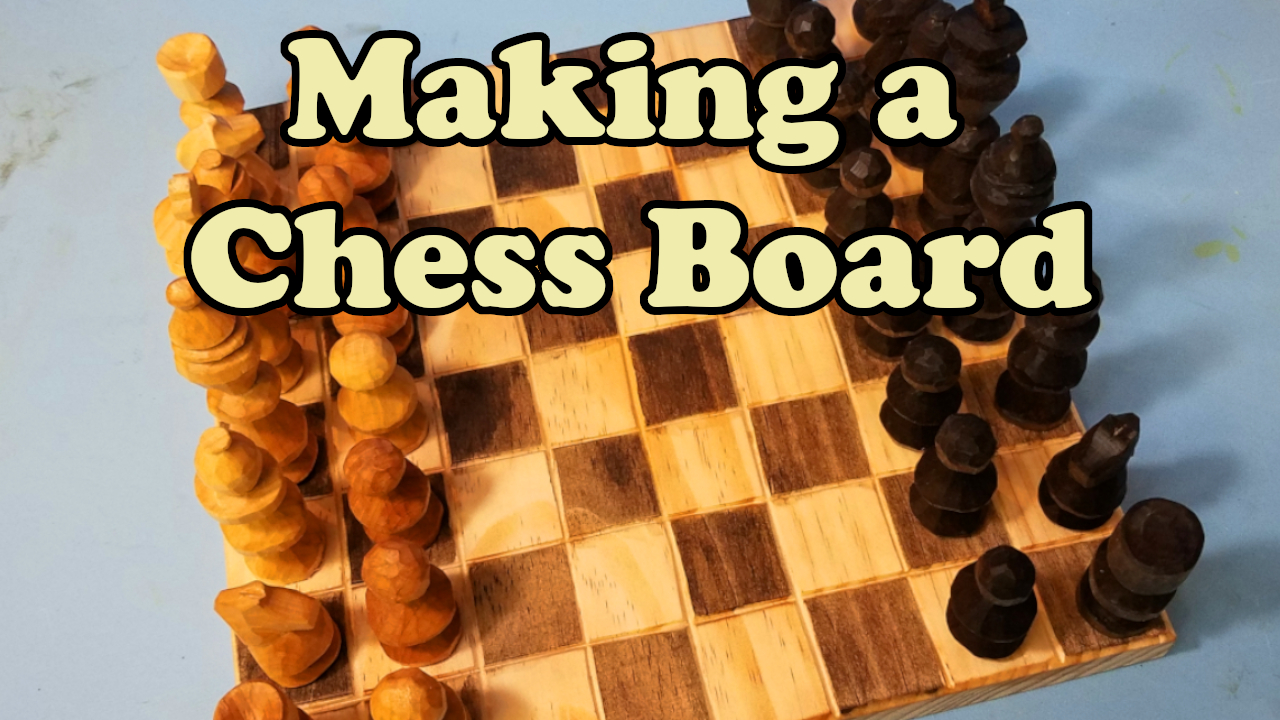
An amazing project for anyone who wants to get into whittling and wood carving is making their own chess set! Since you have to make 32 individual playing pieces, with half of them being the same shape and size, you are able to get in a bunch of practice making the same cuts and building confidence.
This is also a cheap way to build the basic motor skills and understand how to cut into the wood by hand as you aren’t making anything large and using a lot of wood.
Supplies Needed to Carve a Chess Set
In order to carve a complete chess set shown below you will need the following tools and supplies:
- 24 small blocks of basswood or dowel (1″ x 1″ x 2″)
- 8 larger blocks of basswood or dowel (1″ x 1″ x4″)
- A 16″ x 16″ sheet of wood for the board
- A sharp wood carving knife
- A leather strop to keep the knife honed
- paints or stains to color the chess pieces
Carving Pawns
If you are new to whittling or wood carving, I would start by making all of the pawns first before moving on to carving the rest of the chess set. This way you have an easy and repetitive process to practice so you can become more comfortable with the knife and wood.
To make all the pawns for a chess board, you will need to make 16 pawns, which will require 16 blocks of wood cut to 1″x1″x2″ or 16 1″ diameter dowels cut to 2″ in length.
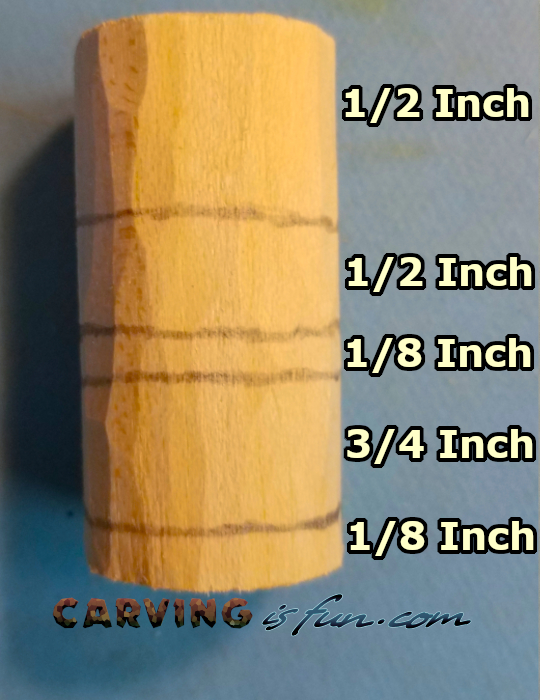
Step 1
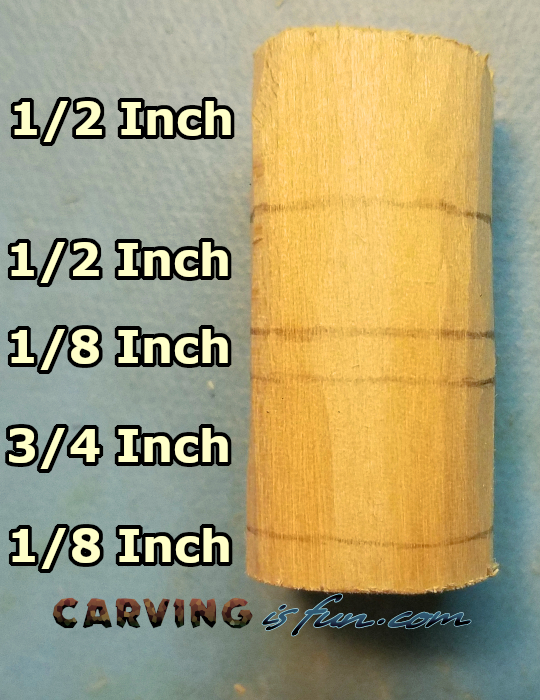
- Start off by taking your 1″x1″x2″ block of wood and turning it into a dowel or cutting your dowel to 2″ in length
- Then draw on your lines with a pencil as shown on the left
Step 2
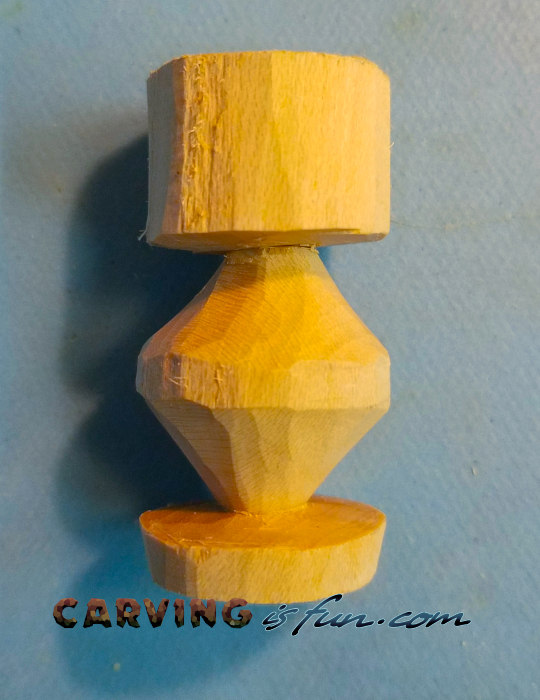
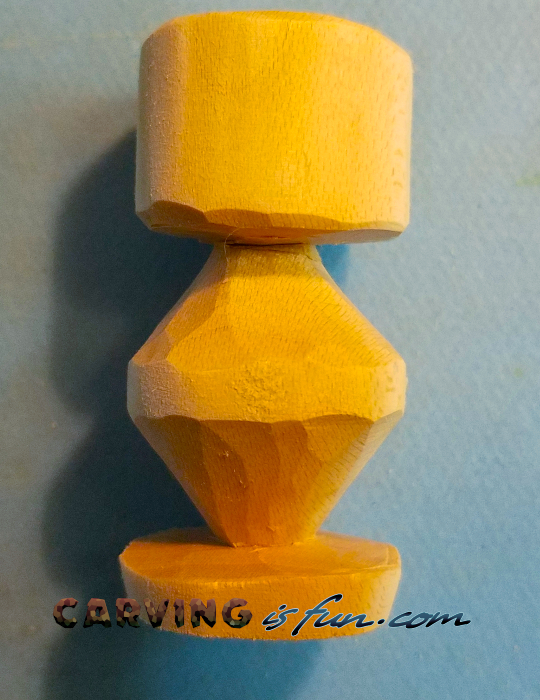
- Start carving from the bottom line upwards and ending at the second line from the bottom.
- For best results, carve at a 25 to 35 degree angle. If you cut too steep, the center will be too thin and brittle.
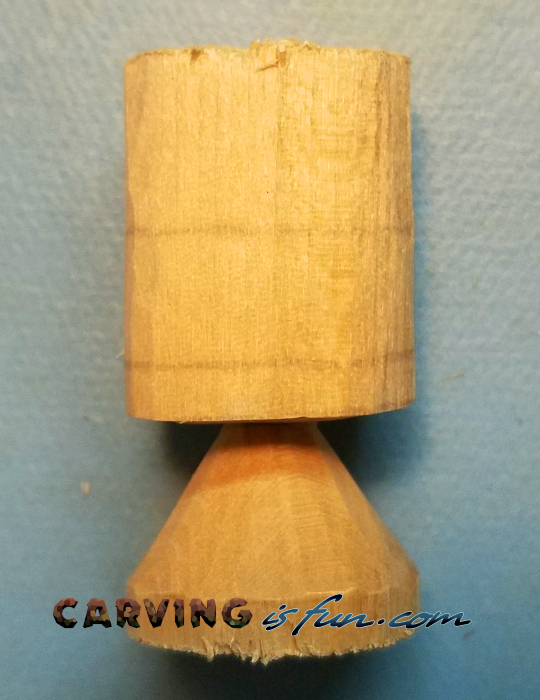
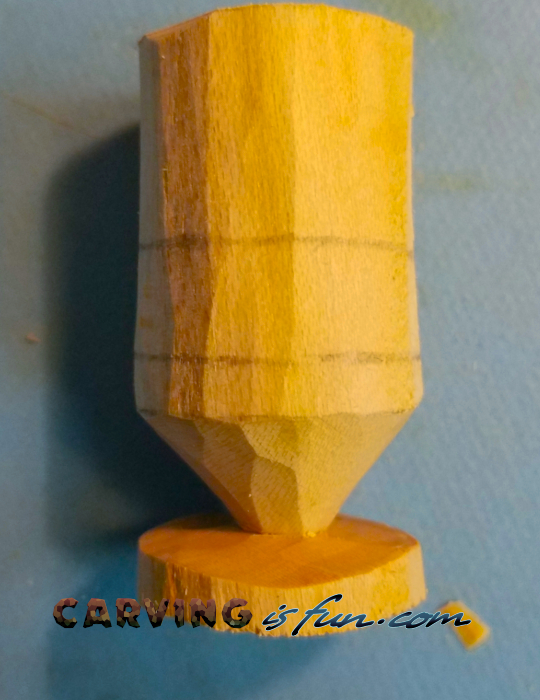
Step 3
- Starting from the middle line and the top line, cut towards the middle of the two lines as evenly as possible.
Step 4

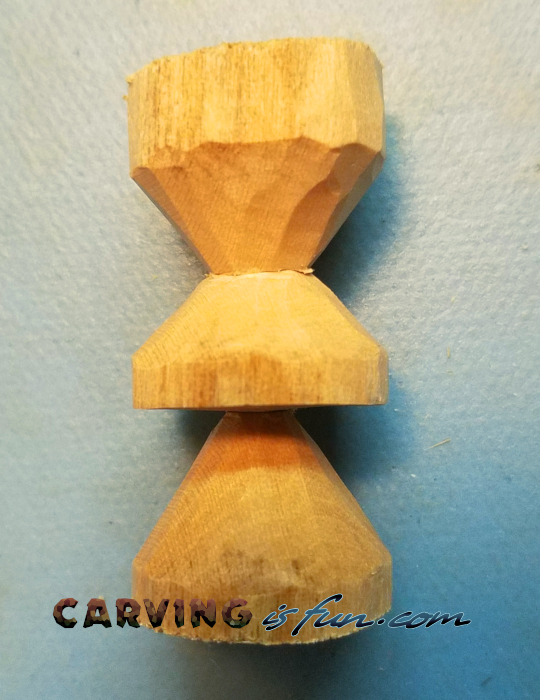
- Turn the top portion of the carving into a sphere by first creating an octahedron and cutting off the corners.
- When you are done, finish with the color stain or paint of your choice and repeat until all pieces have been made.
Pawn Video Instructions
Carving Rooks
Once you have finished carving pawns and mastered working with the wood, it’s time to move on to carving the rooks. These are just as simple as the pawns and will be quick to make.
To make all the rooks for a chess board, you will need to make 4 rooks, which will require 4 blocks of wood cut to 1″x1″x2″ or 4 1″ diameter dowels cut to 2″ in length.
Step 1
- Start off by taking your 1″x1″x2″ block of wood and turning it into a dowel or cutting your dowel to 2″ in length
- Then draw on your lines with a pencil as shown on the left.
Step 2
- Start carving from the line second from the bottom downwards and ending at the bottom.
- Try not to go down past the line or the base of the piece will be too thin. You can always stop before the line if needed.
- For best results, carve at a 25 to 35 degree angle. If you cut too steep, the center will be too thin and brittle.
Step 3
- Repeat the process in step 2 but go upwards as shown in the picture to the left.
Step 4
- Round out the sharp edges on the top piece and if you wish, hollow out the top a little with a hook knife.
- When you are done, finish with the color stain or paint of your choice and repeat until all pieces have been made.
Rook Video Instructions
Carving Knights
Now that you have gotten use to making some of the simpler carvings it’s time to move on to something a little more complicated, making the knights. These will require some shaping of the wood to get a simple horse shape.
To make all the knights for a chess board, you will need to make 4 knights, which will require 4 blocks of wood cut to 1″x1″x2″.
Step 1
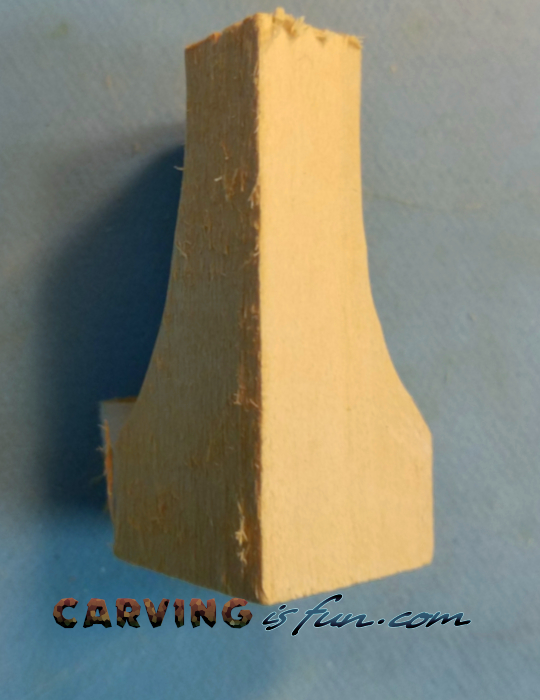
- Make a sweeping cut on two opposing sides from about 1/2″ from the bottom as shown in the left.
Step 2
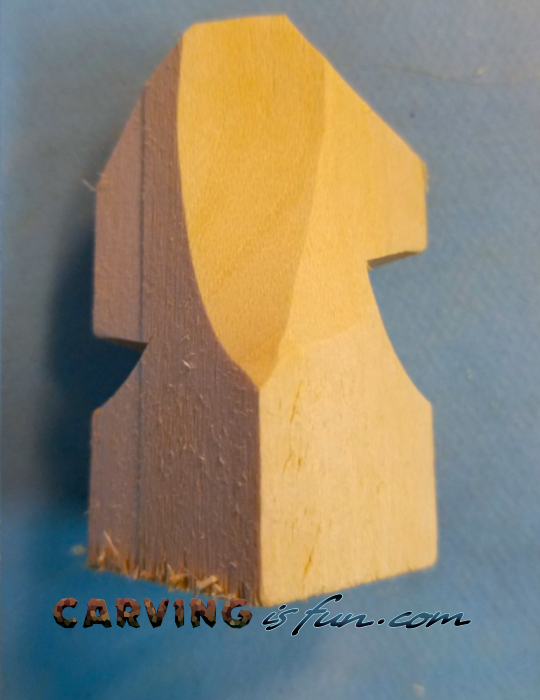
- Turning the pice sideways, make a stop cut under the back of the horses mane (on the left side of the picture shown) and under the horses face (on the right side of the picture shown). These do not need to be exact but at least make them consistent.
- Then make basic shapes on the top of the head to outline the top of the horses face and the back of the head.
- Leave enough wood to work on the ears later.
Step 3
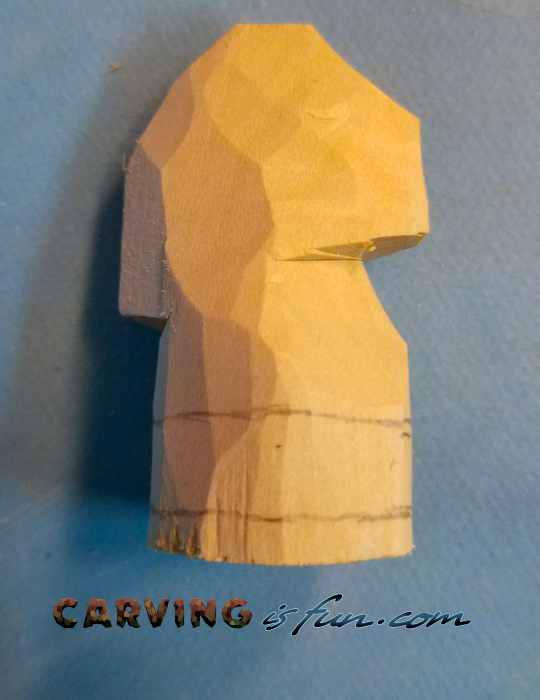
- Start rounding the bottom of the knight to about 1″ in diameter and start smoothing out the horses face to add features
- Draw a line about 1/8″ from the bottom and 1/4″ from the first line.
Step 4
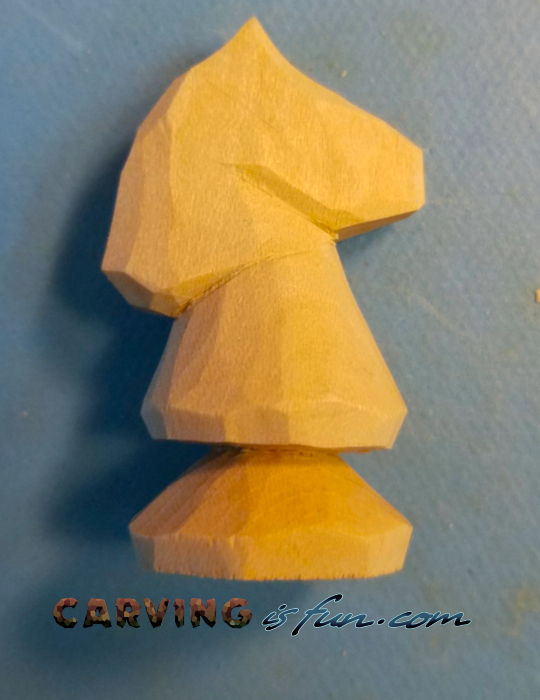
- Before carving the base of the knight, finish the horses face. This can be as simple or as complex as you like. You can use the picture on the left for reference or use the video below to get the final features.
- Just like with the pawns and rooks, carve from the bottom line inwards to create a cone up to the second line.
Knight Video Instructions
Carving Bishops
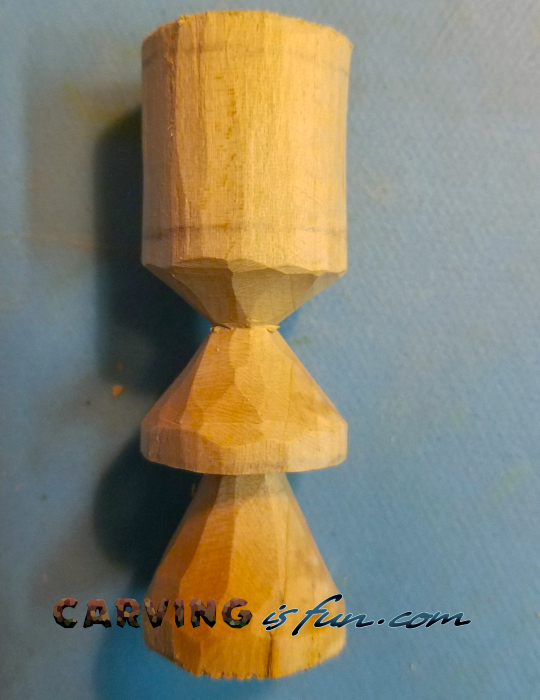
Now At this point, we are going to start making the larger and more intricate pieces of the chess set. While they look complicated, they have many of the same cut patterns you already made on the previous pieces you just made.
To make all the bishops for a chess board, you will need to make 4 bishops, which will require 4 blocks of wood cut to 1″x1″x4″ or a 1″ dowel cut to 4″ in length.
Step 1
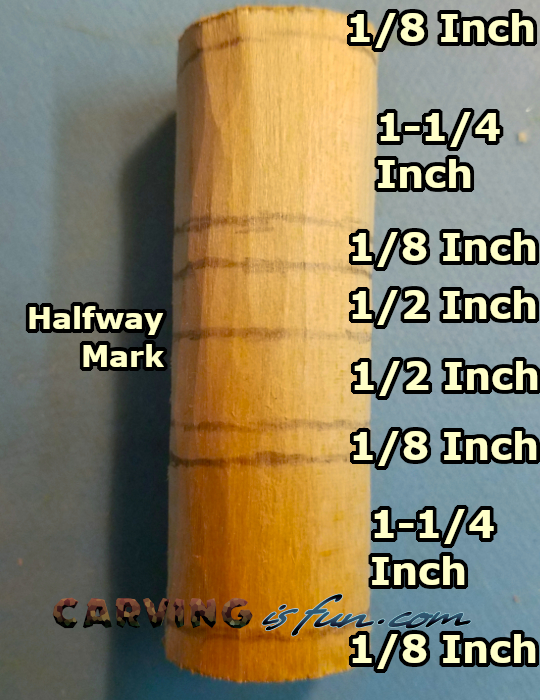
- Start off by taking your 1″x1″x4″ block of wood and turning it into a dowel or cutting your dowel to 4″ in length
- Then draw on your lines with a pencil as shown on the left.
Step 2
- Make your first cuts towards the halfway mark from the lines directly above and below.
- Then make cuts from the second to bottom line to the third line as shown to the left.
Step 3
- Then start making the bottom half of the rounded top as shown to the left and making a flat shelf for it to sit on.
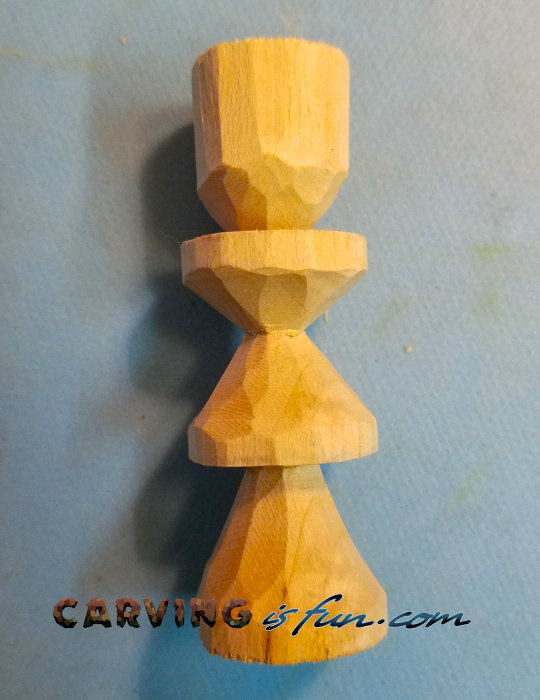
Step 4
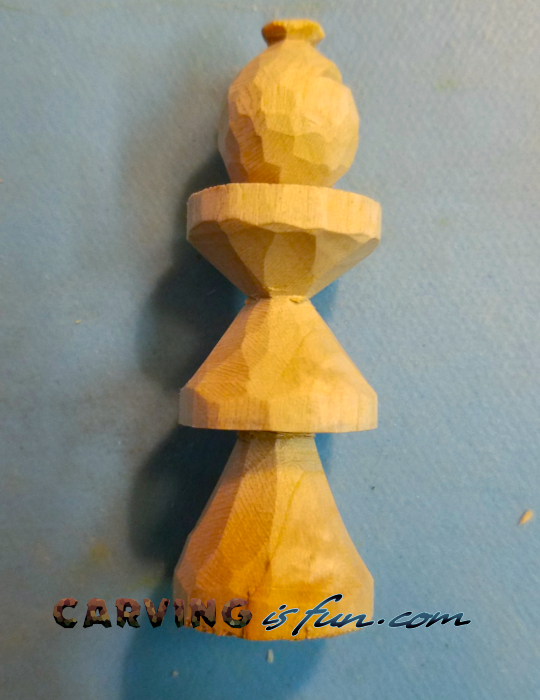
- Continue rounding the top to an egg shape but leave enough wood at the top to create the little hat at the top as shown to the left.
- Add any extra details as desired.
Bishop Video Instructions
Carving Kings and Queens
Finally, it’s time to make the Kings and Queens! These will start off similar to each other but will differ with the crowns. While they look complicated, they have many of the same cut patterns you already made on the previous pieces you just made.
To make all the Kings and Queens for a chess board, you will need to make 2 Kings and 2 Queens, which will require 4 blocks of wood cut to 1″x1″x4″ or a 1″ dowel cut to 4″ inches in length
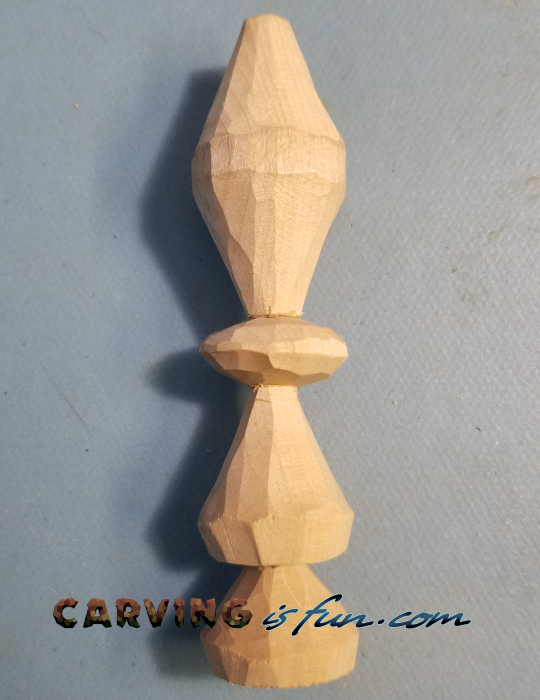
King and Queen Prep Step 1
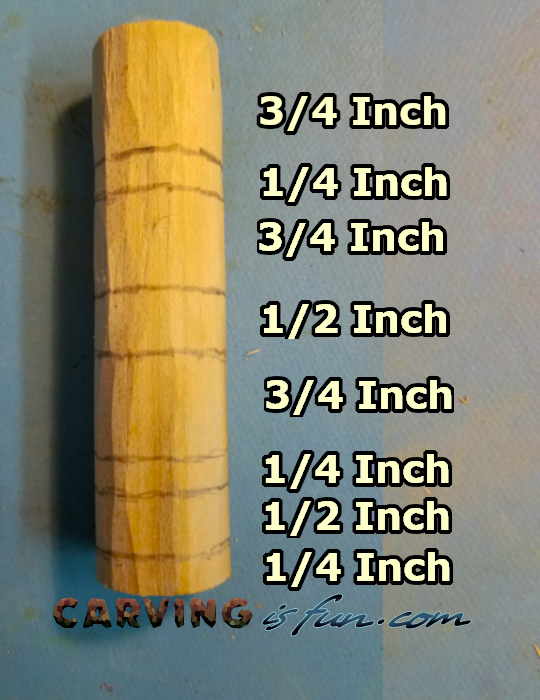
- Both King and Queen will start of the same but the crowns will be different.
- Start by rounding your 1x1x4 inch wood block or cutting a 1 inch dowel to 4 inches in length
- Add the lines as shown in the picture
King and Queen Prep Step 2
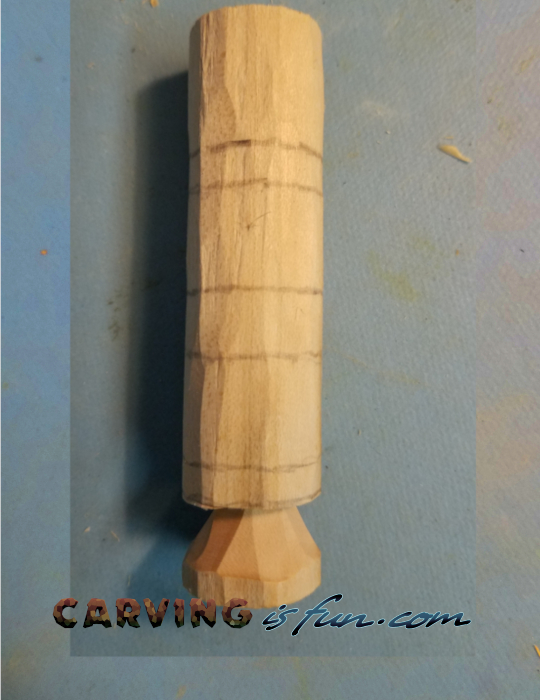
- Start making the bottom skirt from the first line to the second line shown in the picture
King and Queen Prep Step 3
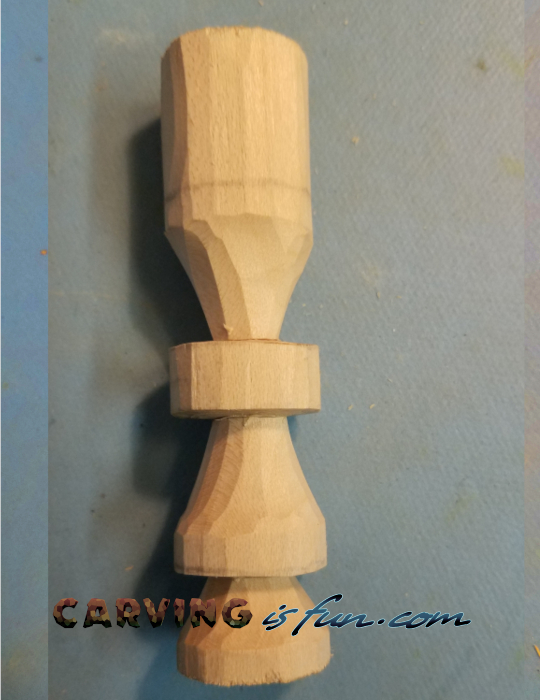
- Create the second skirt from the 3rd line to the 4th line as shown in the picture
- Then from the 2nd line from the top, carve towards the 3rd line form the top as shown in the picture
King and Queen Prep Step 4
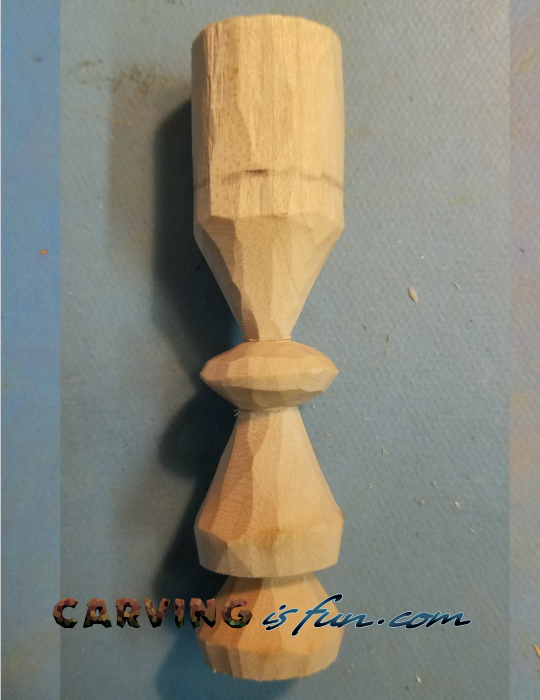
- Round out the center block as shown in the picture
Finishing the Queen
- Now lets start adding the details for the Queens. You will need 2 of these per board.
- Start at the top line and make a cone as shown in the picture. do not carve to a point, but a round circle at the top.
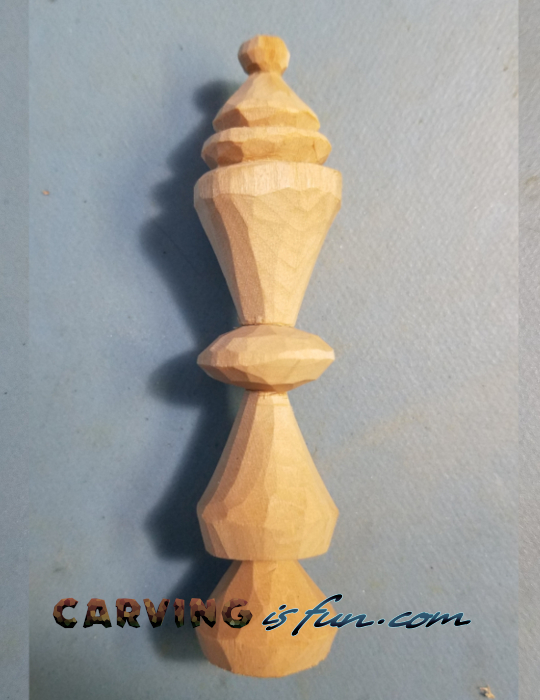
- Start adding small details like rings on the top and a little ball as shown in the picture
Finishing the King
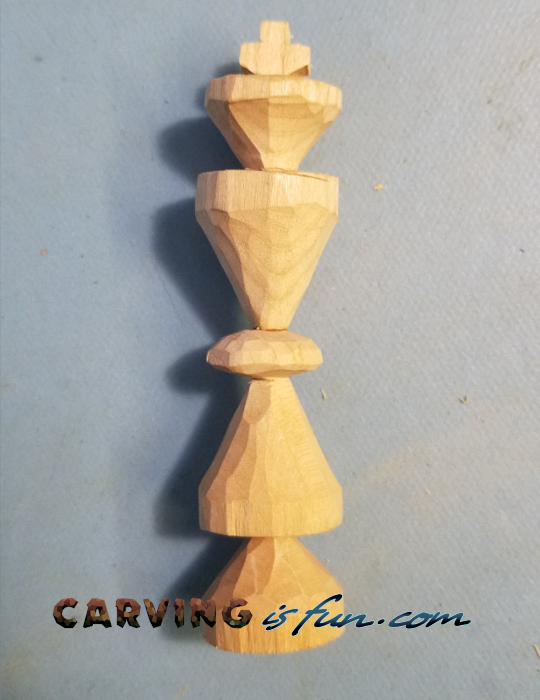
- The King is pretty straight forward, start by drawing a line in the middle of the top cylinder that you haven’t carved yet and then one more line 1/4″ above it.
- Cut a cone pointing downwards to the next line as shown.
- Then carve in the style of crown you desire, see the video below for extra details for how I carved mine.
King and Queen Video Instructions
Making the Chess Board
All you need to make your own chess board is a flat piece of wood, some paint or stain, and if you want to get fancy, a v-gouge or knife.
The Ideal square size is about 2.25 inches, but if you are making one for fun, make the squares about twice the size of the chess piece diameter and you should be good!
The chess board needs to be an 8 x 8 layout to fit all the chess pieces properly.