Pen turning is a wonderful hobby that not only allows you to create a beautiful piece of art, but a utilitarian item that will be used every day!
I have seen hand crafted, custom made pens easily sell between $50 and $200 for basic builds and some very high quality hand crafted pens sell for over $1000 to the right person!
Lets go over how you can make your own pens at home!
Gathering tools and materials (pictures in Required Materials folder)
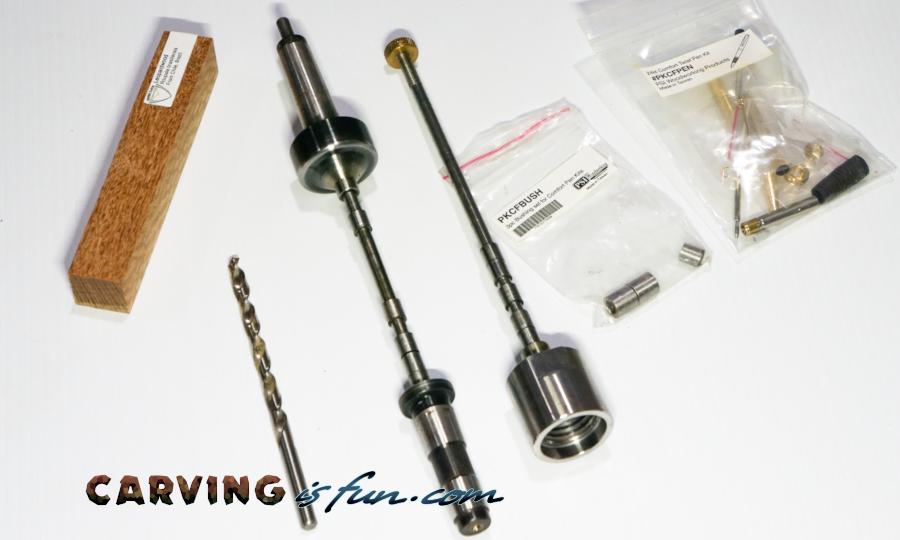
The starting required tools for pen turning, aside from a lathe and lathe tools, are a pen kit, bushings, a drill bit, and a pen mandrel. It is possible to do it without a mandrel, but vastly easier and will save a lot of time and headache.
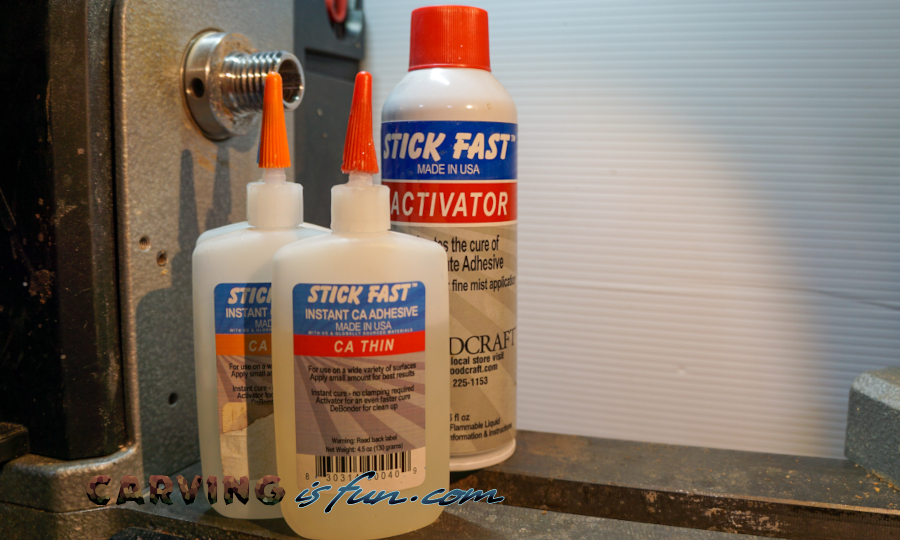
CA glue (super glue) will also be needed to attach the pen barrel to wood, as well as sand paper and some kind of wood finish. Lastly, and most important of all, is the pen blank. There are a few other tools I will mention that make life easier as we create.
Pen blanks are small pieces of wood, usually cut offs and scraps, that are turned into pen barrels. They can be made from any wood (even punky or dry rot wood that has been stabilized), but harder woods are easy to sand.

Softwoods will have tear outs if your lathe tools are not super sharp, but can work perfectly fine. A nice figured cedar is excellent, or use a scrap cut off from a 2×4.
Other materials can make excellent pens, like the vast variety of resins or hard substances like antler, and even soft clay that is baked in the oven. Most blanks are ¾ of an inch square by 5 inches long. That’s large enough for just about any kit.
Pen kits are sold at many different online retailers, but I would suggest you buy good quality. I get all of mine from Penn State Industries or Woodcraft locally. The cheap sets I have purchased in the past had problems, and these two retailers will fix any problem you have with the kits.
Quality kits aren’t that much more expensive either. Regardless of the kit you purchase, make sure you get the correct matching bushing set. Bushings will be your gauge on the diameter of the pen barrel as you turn and can differ from style of kit. If you buy an assorted set of one style, often they will include a package of bushings.
Also take note what size drill is required. Most kits use a 7mm bit, but some thicker and fancier kits require an 8mm or larger.
Safety note: when turning always wear a face shield. You are taking a small block of wood and shaving it down to a fraction of an inch thick. A blank fracturing apart is possible. Something simple like the Sellstrom Face Shield is cheap, gives enough room to breath and is less likely to fog up on you as it allows your breath to easily disperse. You can pick them up for cheap on Amazon here: https://amzn.to/3x8L0GA
Furthermore, I would highly suggest wearing a respirator or at least a dust mask as it will help with most woods, but some, like cocobolo, are toxic. It’s like inhaling pepper spray while you turn. Other materials like polyester resin and especially horn or antler stink to high heaven and a respirator helps dramatically.
A good low profile respirator with replaceable filters is ideal as you can wear it behind a face shield. One of the best options available right now is the Elipse P100 Respirator on Amazon is a great option, you can pick one up for a good pirice here: https://amzn.to/3TTpr6C
Pen Blank Prep
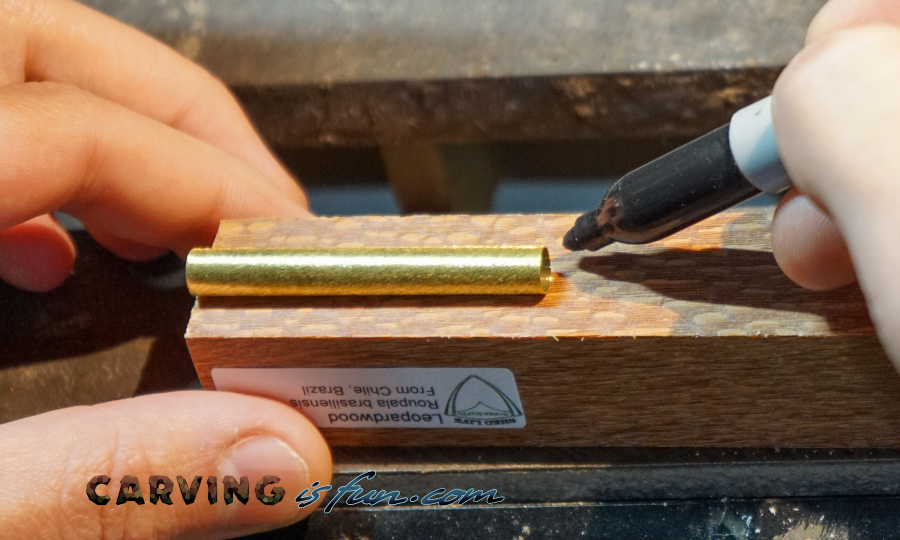
Rulers and measuring tape are not required. Line up the brass tube with your wood and mark it (fig 1a,b,c). Give yourself a little wiggle room on either side.
Next you will need to cut your blank. Use whatever method you are comfortable with, such as a band saw, hand saw, etc. You do not need to be precise, it’s ok to be sloppy. I can’t cut a straight line with my band saw to save my life, but that doesn’t matter (fig 2a,b).
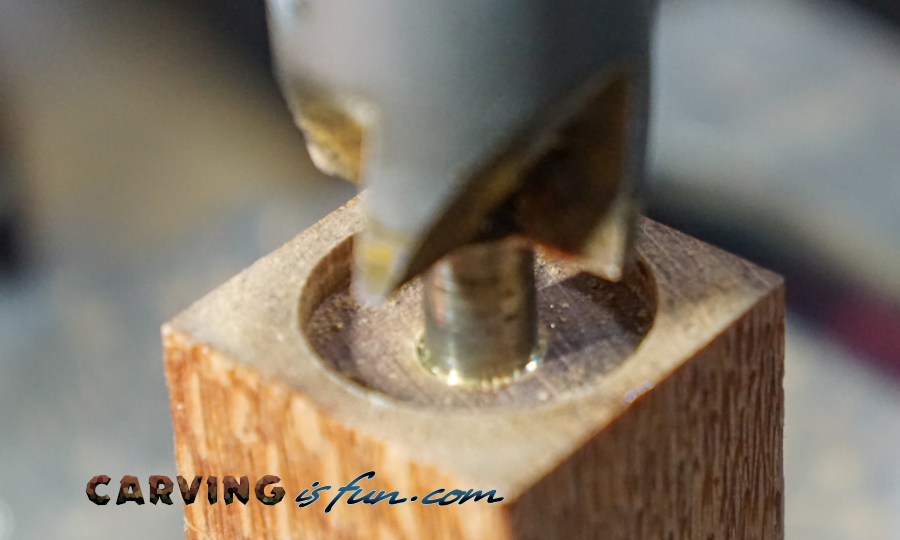
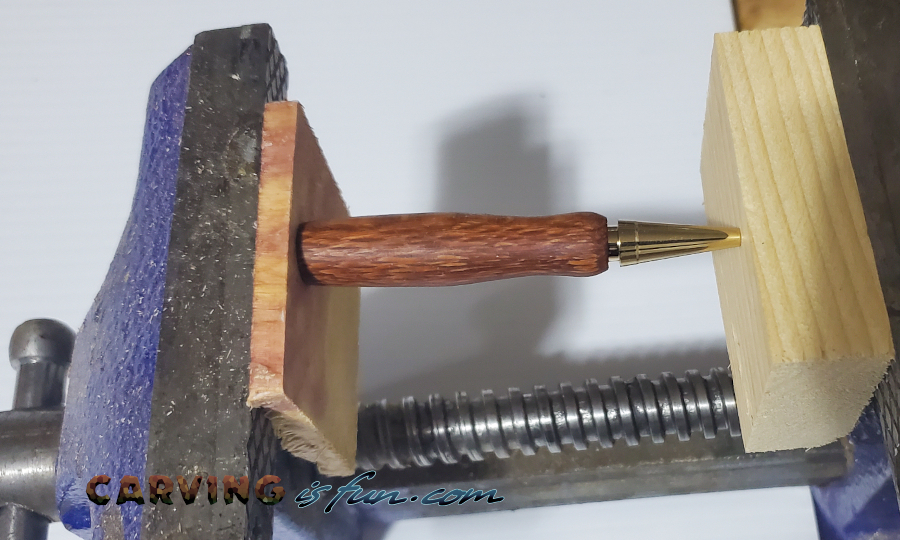
Drilling the hole through the blank can be done before sawing, but the longer the piece is, the easier it is to make a mistake. To drill the hole, you can use a vise (fig 3) or a specially made pen vise from Penn State Industries (fig 4) with a drill press or a steady hand with a cordless drill.
My preferred method is with pen jaws and drill chuck (fig 5a). This gives me the straightest hole with the least worry (fig 5b).
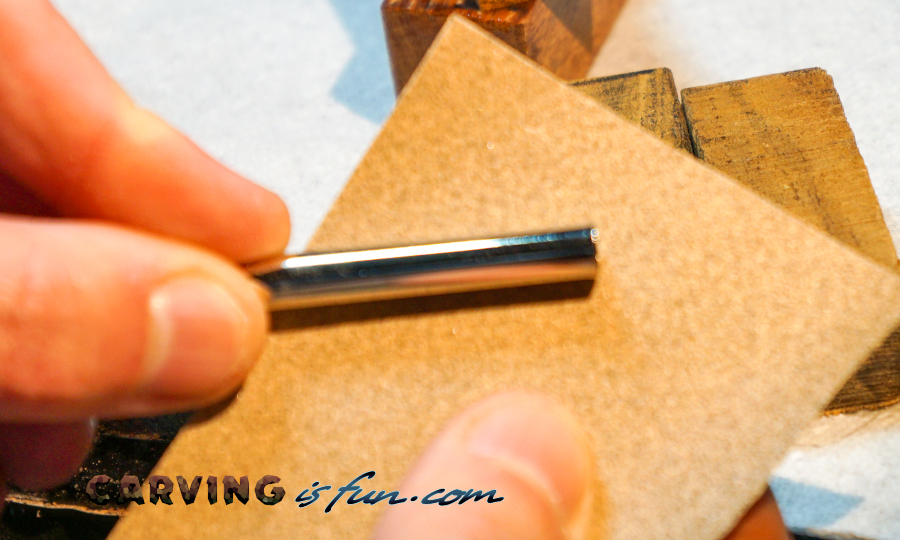
With the hole drilled in both pieces (assuming your kit has two barrels in the pen), check to see if your brass tubes are smooth or roughed up. Some come pre-scuffed. If they are smooth, you will need to sand them with a 150 or 220 grit paper, so that the glue has something to cling on (fig 6).
Apply CA glue (superglue) to the brass barrel (I like to use the “thick” CA glue for this part), and then insert it into the blank, gently spinning the tube as it goes in (fig 7 and 8).
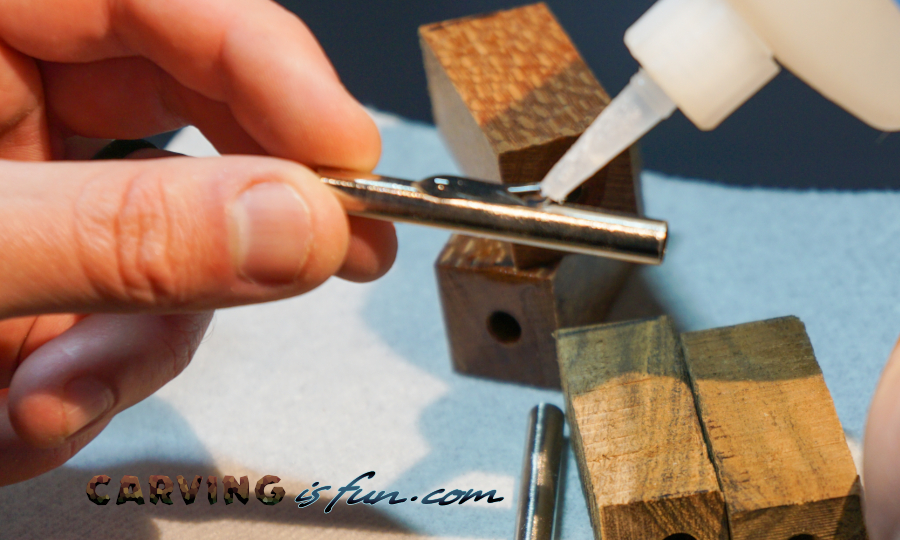
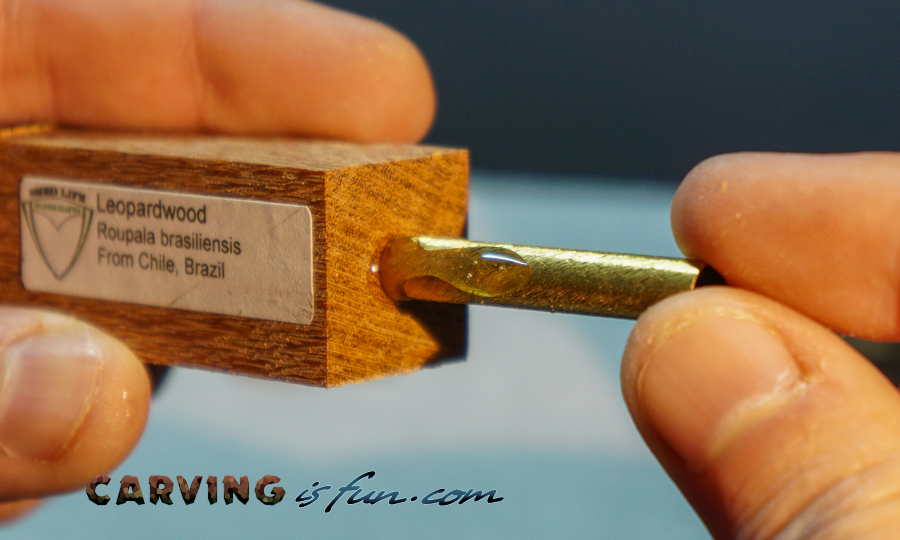
This will insure an even coat to bond well with the blank. The tube should be just below the wood on both sides of the blank (fig 9). If you have accelerator spray, you can spritz the CA glue to harden it faster. Now is a good time to do more drilling and cutting off blanks while this one dries.
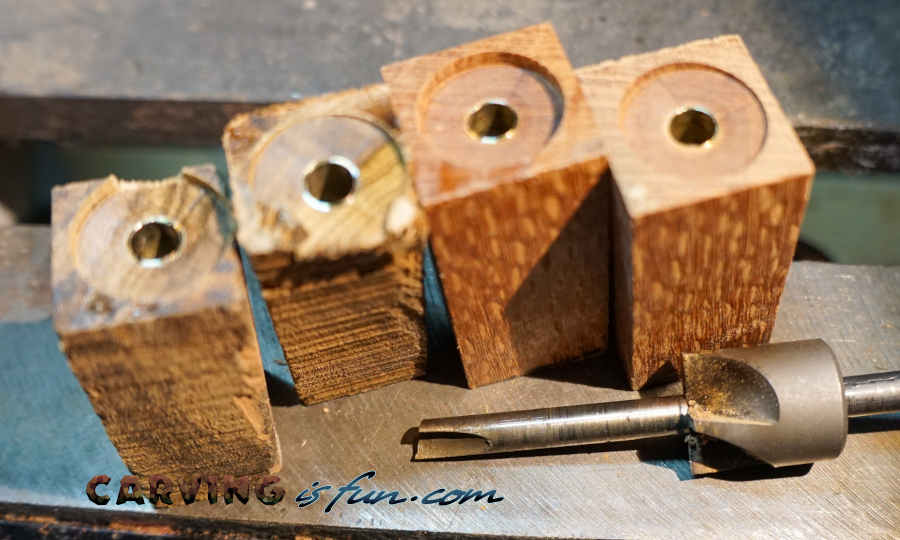
The last step of prep is to trim the blank to the tube. Some people get a specific miniature saw for this, but it is easy to use a disc sander if you have one (fig 10).
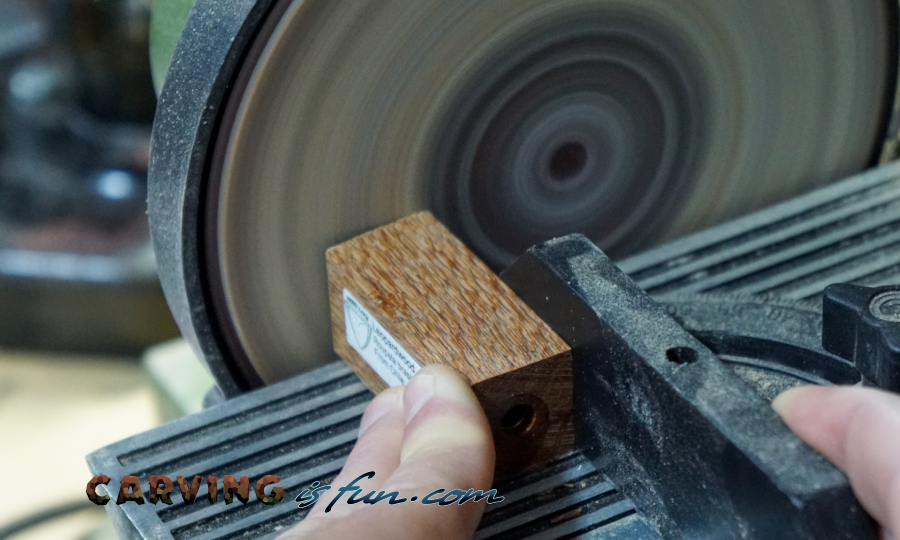
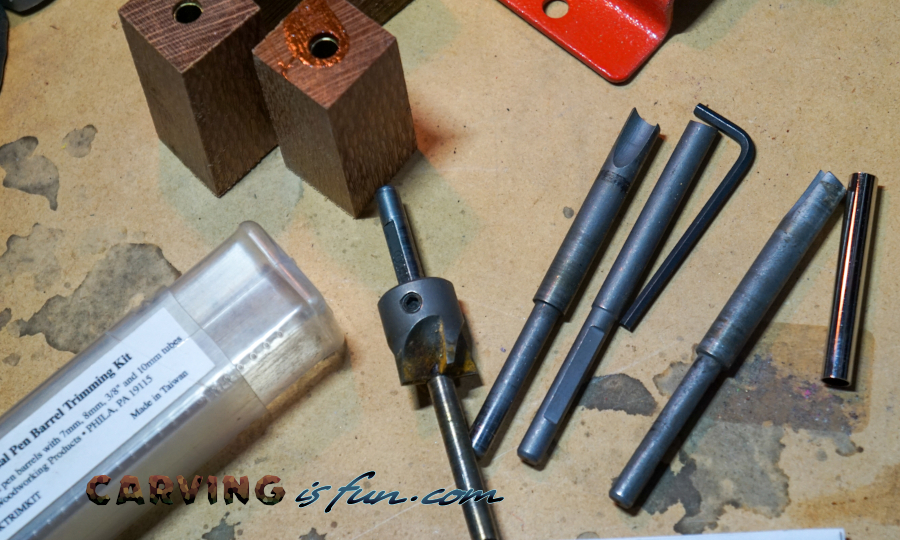
If your blank is too long, trim it shorter before sanding it flush. My preferred method is to use a tool called a barrel trimmer. You buy it as a kit to work on just about every size you’ll need. Get the more expensive carbide version so that you don’t need to sharpen it (fig 11a, b, c).
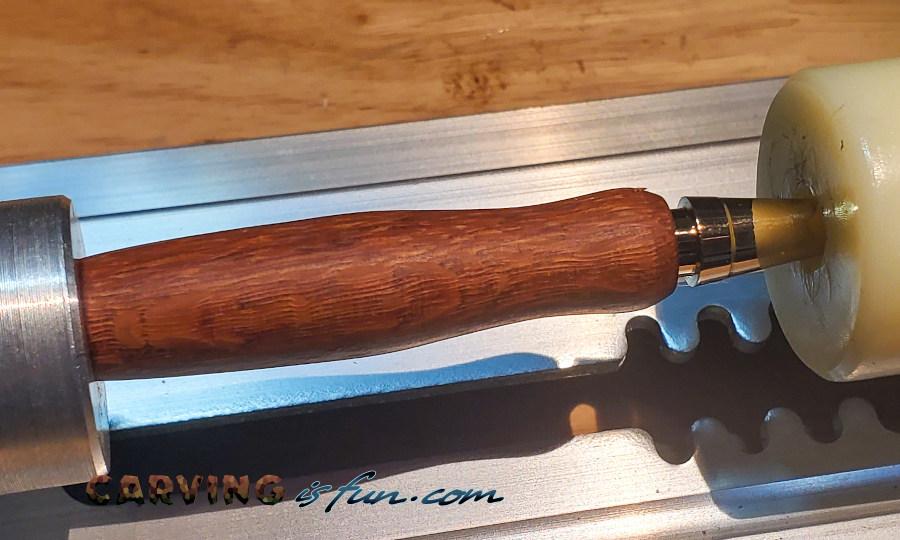
Mounting
There are several different styles of pen mandrels on the market. I have and use both a direct mount mandrel that uses a brass nut to tighten the stack together and a #2 MT that uses a tailstock center. The later one is a little more expensive, but works much better in my option.
After a lot of use, the brass nut gets annoyingly stiff to tighter or unscrew, and too much pressure can be accidentally applied to the mandrel, causing it to bend.
With either style, use several spare bushings (with mandrel kits, you get a few extra) to space yourself away from the head stock. Put your first blank half, then any special bushings you need in the middle, and then the back bushing.
Some kits will have odd sized bushing, but the instructions will always tell you the order. If it matters to you, make sure your wood is aligned so that the grain matches, as it will be too late after we start turning. I like to visualize the pen tip as the piece closest to the head stock. Tighten your mount or tailstock and you are ready to make chips.
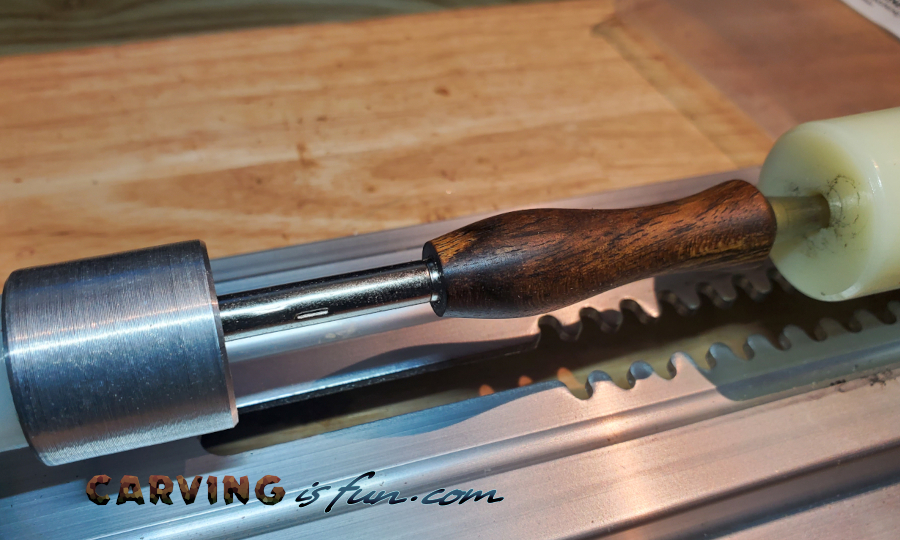
Shaping the Pen Blank
Start off with turning the blanks to round. It is a good idea to have a design in mind and make a sketch of the profile before trying to make shapes, though freestyling it can produce interesting results at times. As you turn the material down, take fairly light cuts.
It your wood catches on your tool, you are either being too aggressive, or your bushings are not tight enough together. Use any tool you prefer to get it to round, such as a roughing gouge or chisel. My go-to is a thick scraper.
I use a chisel to mark where I want to make dips or other figures, and for close up work on the ends. Think of how the end user will hold the pen, and what will be comfortable.
Take it very slow around the bushings or when you are trying to get flush with the bushings. You can easily take more material off but it is a lot harder to put material back on. The bushings themselves will be scratched and beat up from time to time.
They are consumables, and may need to be replaced every two dozen kits if you are sloppy. If you make a mistake and trash the blank, don’t fret. They sell packages of just the brass tubes at reasonable prices. It’s wise to pick up one just in case.
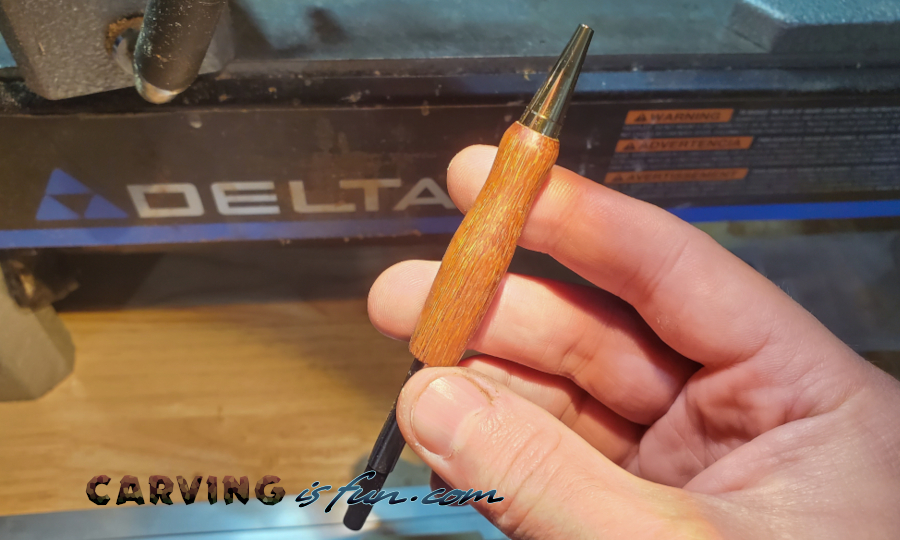
Sand and Finish
Once you are finished shaping, turn your lathe to a low speed and get the tool rest out of the way. Depending on how many tear outs you have and how sharp your turning tools are, you’ll want to start with a 100 to 220 grit sand paper.
If your lathe is turning too fast, you will build up a lot of heat and wear out your paper faster. I also like to use a sanding sponge.
In between grits, stop the lathe and sand laterally so that you take off your sanding rings before moving on to the next grit. If your pen blank is wood, I recommend going up to a 320 grit max, otherwise, you might lose the wood feel. It’s the texture that sells it.
At the last sanding grit I use, I will start to apply a finish and sand at the same time. A drop of Doctor’s Woodshop Walnut Finishing, or actual walnut oil, on sand paper will act as a wood filler while you sand and leaves a nice subtle finish.
I also use Doctor’s Woodshop Pens Plus as a friction finish to polish it up to a high gloss. Both of these products are not very expensive and last a long time. I’ve done about a hundred pens and used less than half a bottle. It also works great on any bowls or spindles you turn.
Regardless of finish, as a pen gets used lovingly over the years, the finish will ware. I have found that these two keep the wood looking and feeling like smooth aged wood, and my daily use pen stays in a pocket with keys every day.
If you use any of the resins, or decide to do a CA glue finish on the wood (if it is fragile or full of holes, do this), take that sanding up to the max. After 320, I start wet sanding with 600 grit, and then move on to a product called Micro Mesh that gets up to 12000 grit.
The small pads are not expensive, and they last a long time. The whole process is much more time consuming, but gets you the super smooth feel with no scratches at all. Safety warning: if you use a CA glue to finish, make sure there is no cotton in your rag or paper towel as you apply the liquid. Cotton reacts chemically, and produces a foul vapor that will sting your eyes something fierce, like onions on steroids.
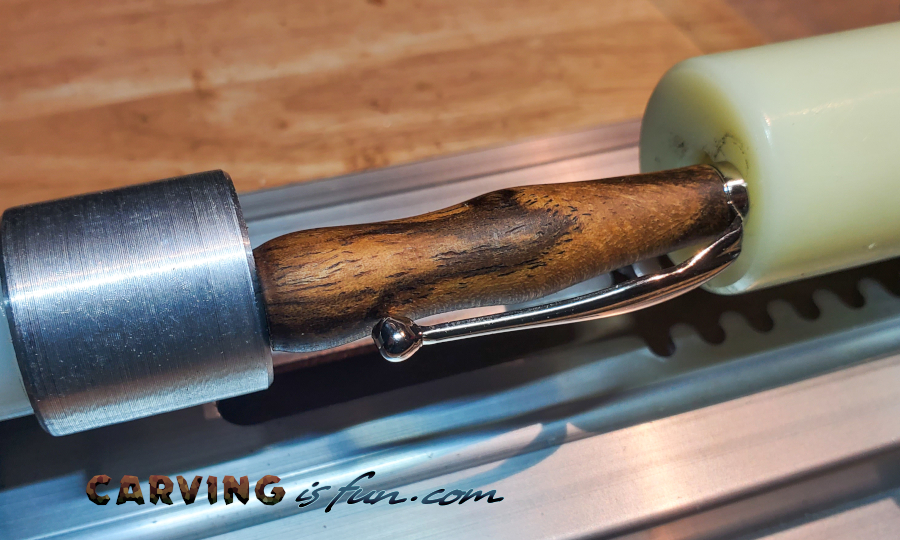
Assembly (pictures in Assembly folder)
Final assembly of the pen should be done with care and patience. You can use a bench vise (fig 12) or a pen press like the one from Penn State Industries (fig 13).
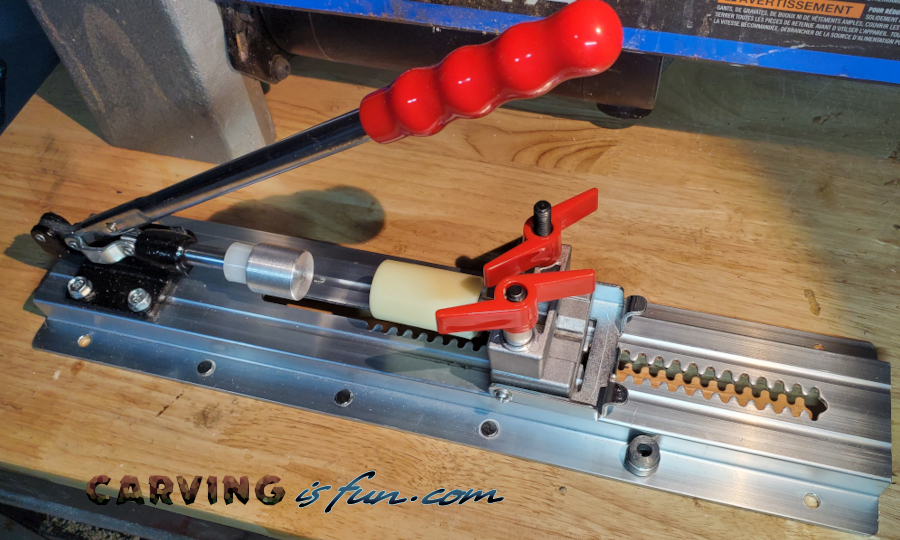
While the vise is incredibly accurate, a pen press has the ability to take apart the pen should you make a mistake. Assembly order should always be on the instructions that you get with your kit.
Start with pressing the pen tip into the first barrel, making sure you are using the correct side of your pen blank (fig 14).
If using a bench vise, don’t let the steel come into contact with either the pen tip or the wood of the barrel to prevent damage. Use a soft wood or scrap of leather as a buffer. For a twist pen, the most common you will start out using, place the brass end into the front tube, and slowly press it in until the brass is no longer showing (fig 15).
Take it out of the press and put the ink cartridge into the pen, screwing it in like you would when finished (fig 16).
You are checking to see how far the pen extends and retracts. It is critical that you take your time and then make small adjustments to the depth of the twist assembly. Should you go too far, you will need to disassemble the whole thing (which is a pain, but possible with a pen press).
Press the back end cap and the clip to the rear pen barrel (fig 17).
Slide the decorative ring over the installed ink cartridge and hand press the two halves together. Line up the wood grain if you need to, and you are now finished. Take a moment to admire what you created.
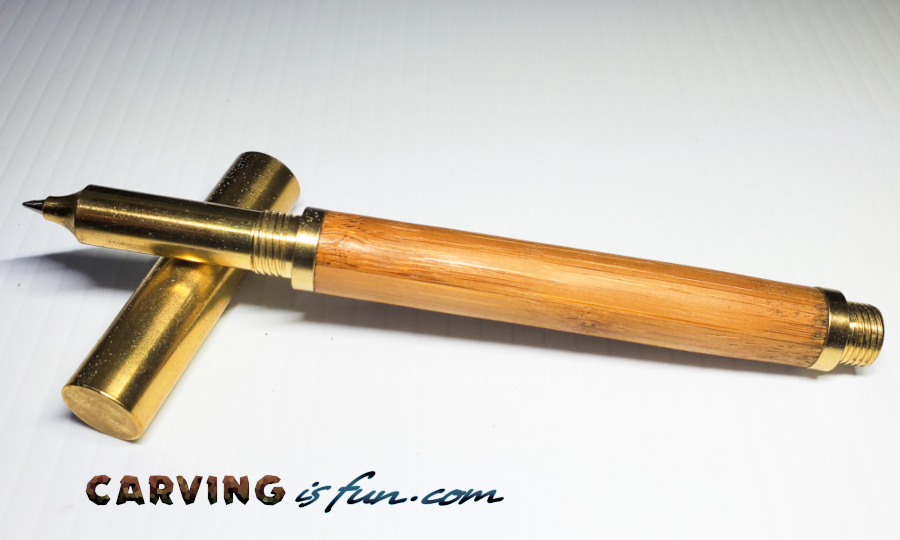
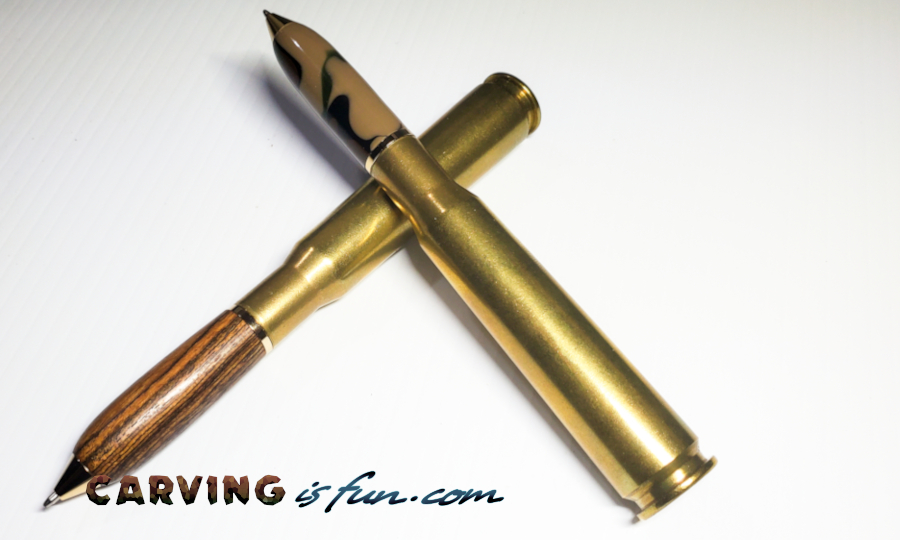
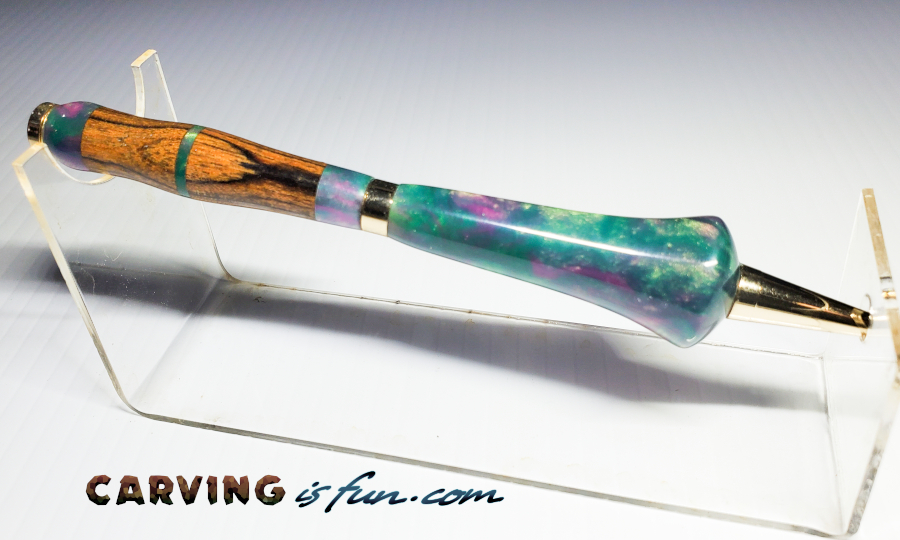
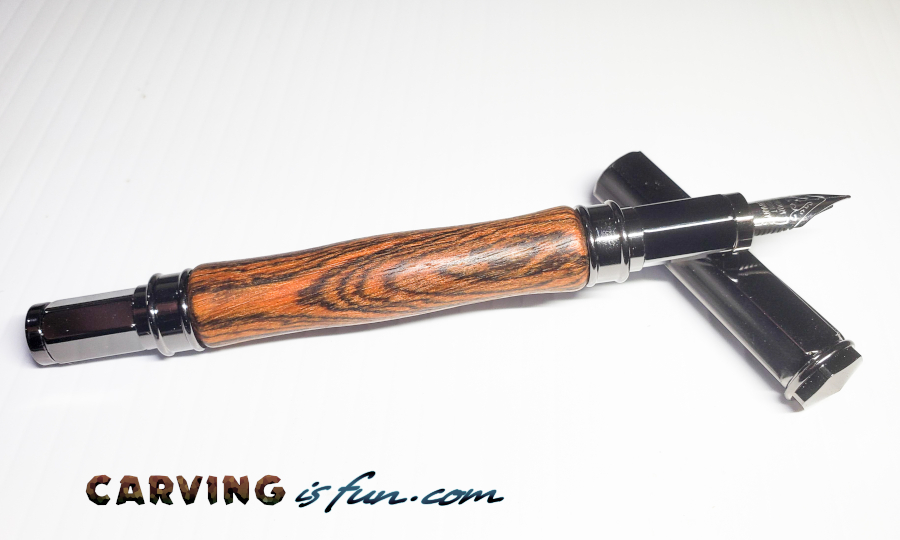
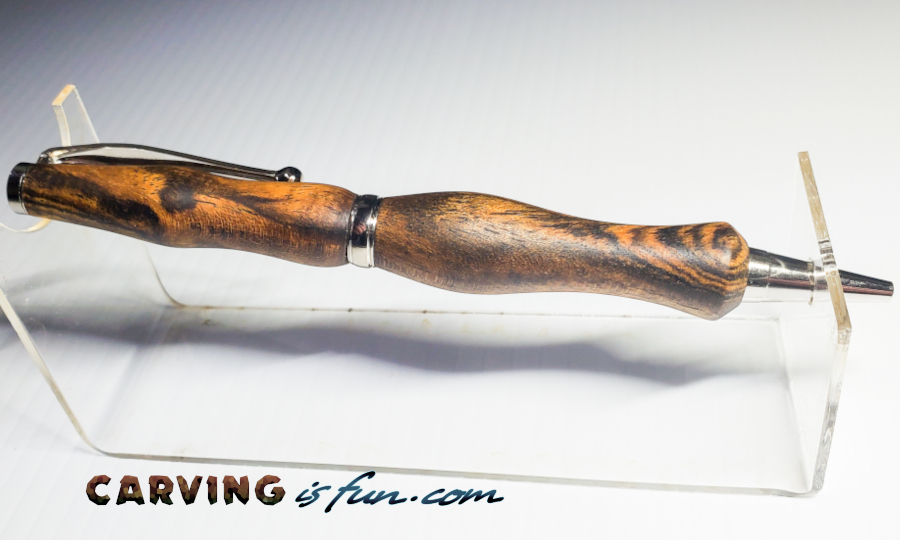
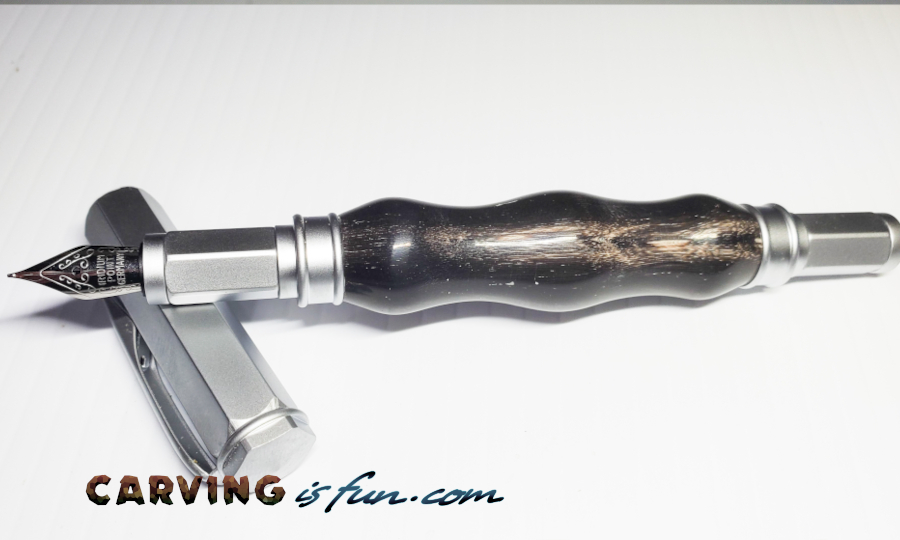
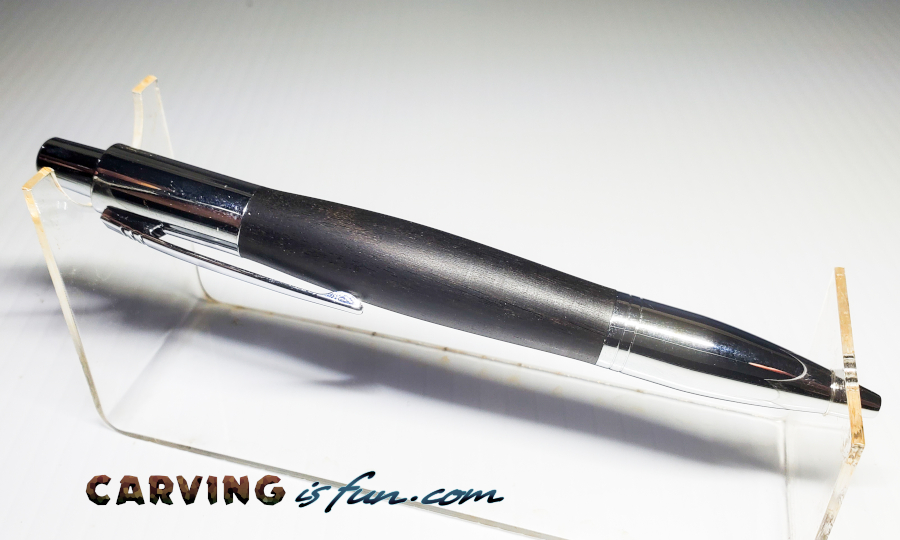
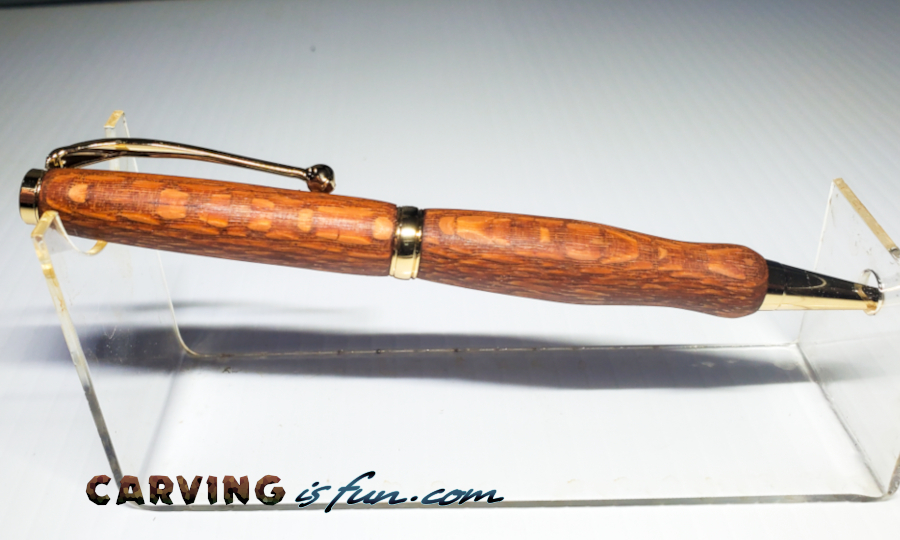
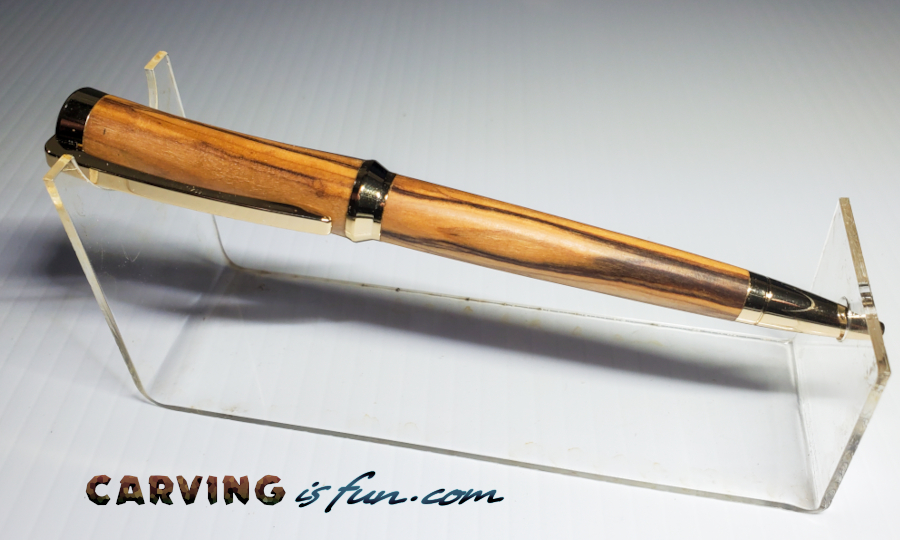
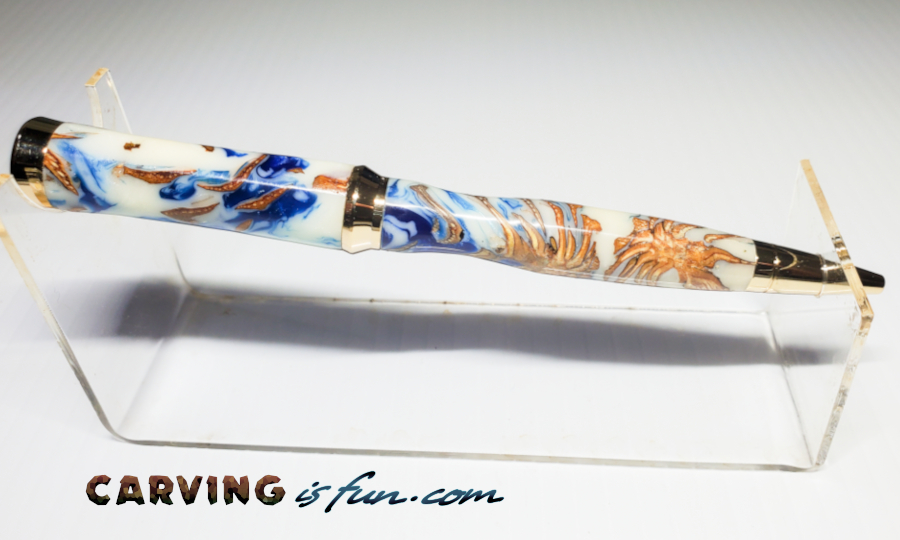
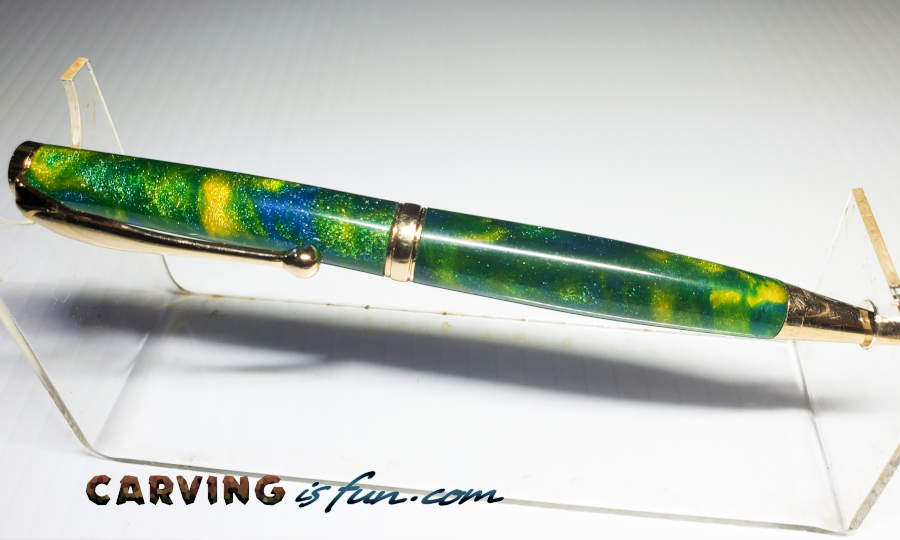
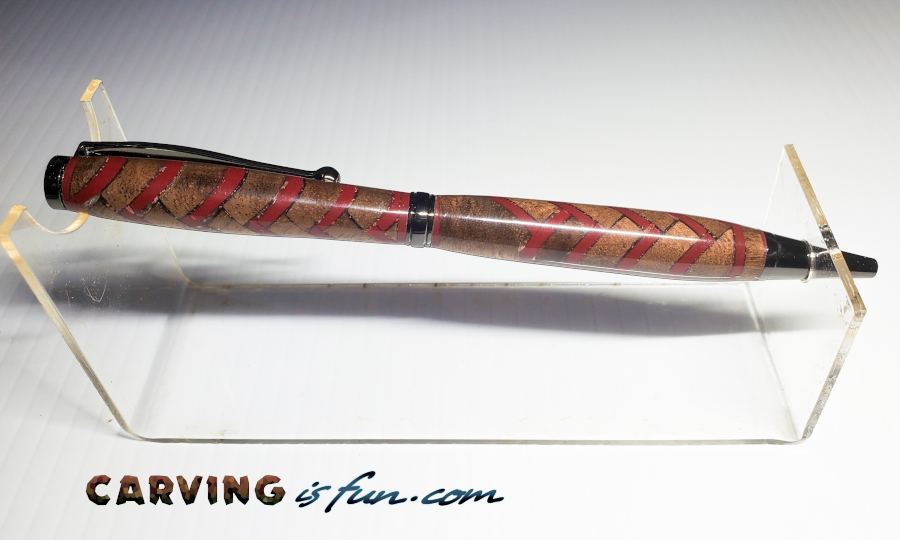
Pen Turing Idea Gallery and Examples
All pens and instructions were written and taken by my friend who wishes to stay anonymous and has given permission to share his skills on Carving Is Fun.