Here is a fun and easy whittling project for beginners, a simple bunny! This should only take you 20 to 30 minutes to do.
Here is what is needed to make the bunny:
- Sharp whittling knife
- 2″ x 1″ x 1″ block of wood
- Pencil
- Leather strop
You can always use a larger block of wood if you wish, but it will take longer to whittle.
Before starting, make sure your whittling knife is nice and sharp. It is always a good idea to hone your knife with your leather strop before starting to whittle. If you feel like your knife is starting to dull out while whittling, strop each side 10 to 20 times and continue.
Video Guide
Step 1: Trace the Outline
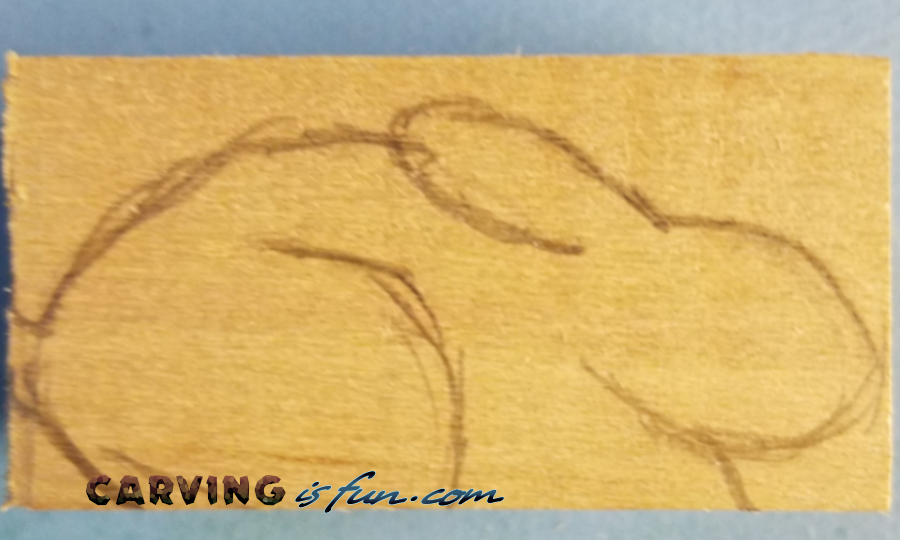
The first step is to outline what you want the final wood carving to look like.
This doesn’t have to be perfect or turn out exactly as you drew it on the block. Drawing the outline is primarily to help you envision and plan how to cut the wood.
Make sure you are leaving enough room for the tail!
Step 2: Cut Out the Bunny
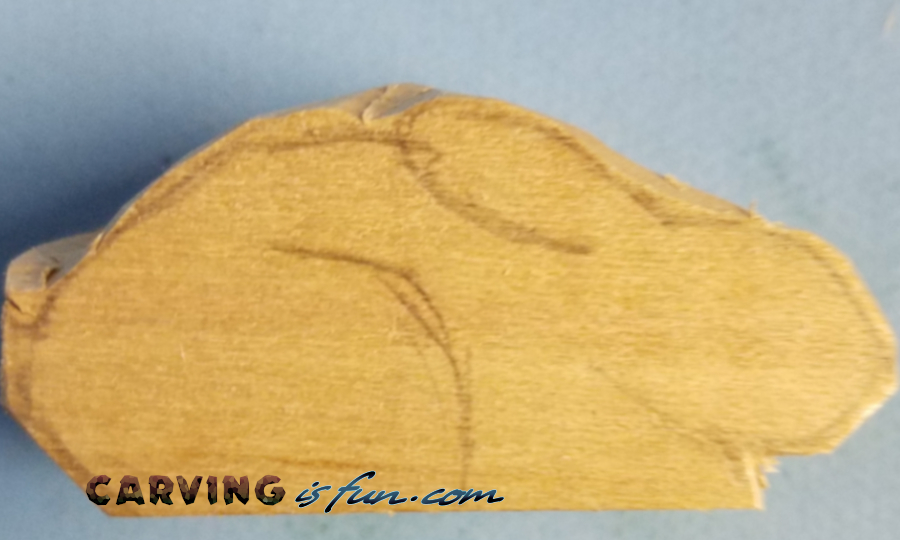
Next, cut off the excess wood with either a hacksaw or your whittling knife.
I personally like to work in a 2D perspective at this stage to help keep your outlines and prevent you from cutting away too much wood in the beginning. You don’t need to cut right on the line and a good practice is to cut just on the outside of the line you drew.
This gives you more room for error until it is time for detailed whittling in the next step.
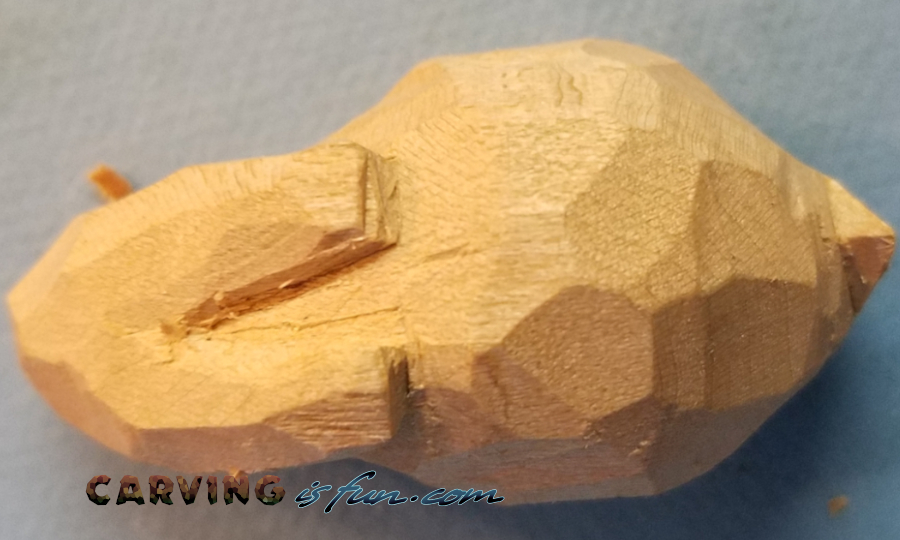
Step 3: Add Details on One Side
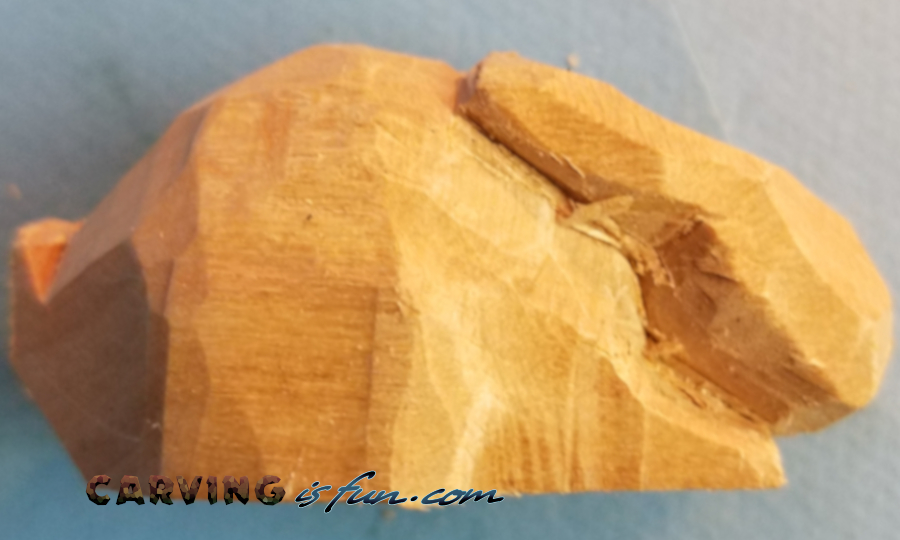
At this point, start rounding the edges and adding 3 denominational details to one side.
I like to remove about 1/6″ off the sides around the head and front of the body while leaving nearly the full 1″ width around the rear legs (see step 5 picture for width reference).
Use several v-cuts to separate the ears and heads from the body for added detail and depth.
Make sure to taper the back of the bunny towards the tail and try not to cut off the tail.
Step 4: Mirror Details on the Other Side
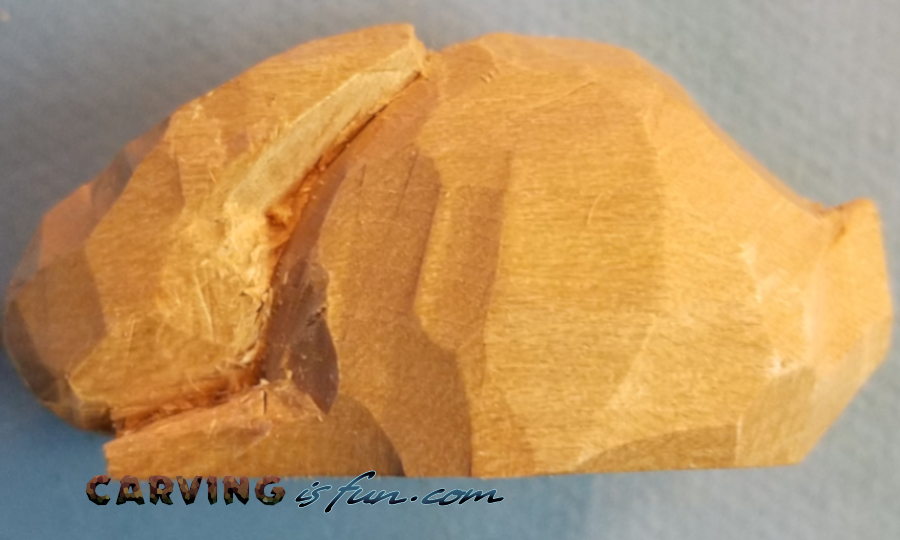
Copy the same cuts you made on one side to the other side as closely as you can. This doesn’t have to be perfect at all and can be adjusted in the next step.
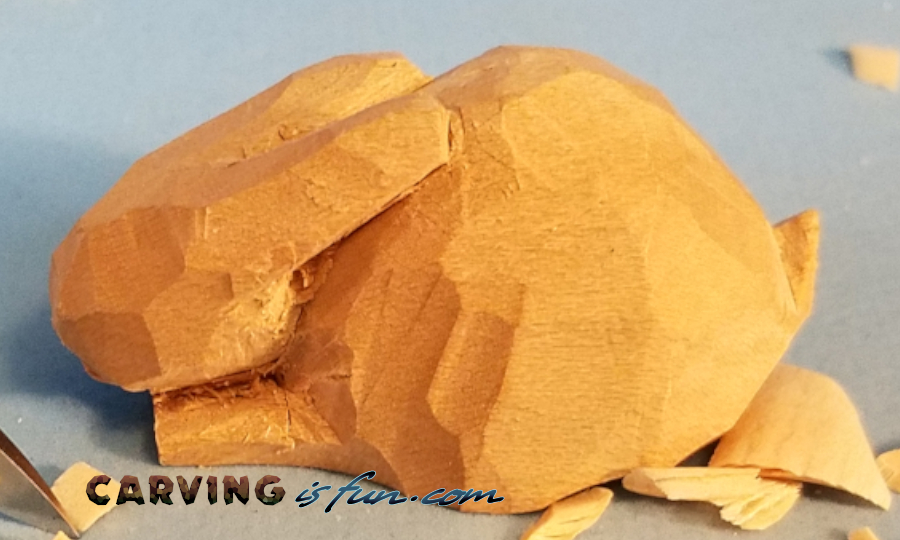
Step 5: Add Details on the Top
At this point, you can start separating the ears, finishing the details on the tail, and making the sides as close to the same proportions as possible.
This is also a good point to round out the sides as much as you can.
Step 6: Clean Up Cuts and Smooth Out
Finally, round off the ears, and make any minor detailed cuts to the head and ears to further define them from the body.
I like to round the body a little more from the bottom of the wood carving up so that the body has a more organic shape from the base up. Make sure you don’t remove too much wood and cut with and across the grain properly.
Feel free to add eyes, nose, and mouth to the face if you want. I personally like to keep the faces simplistic as I find they look better.
Make sure to sign the bottom of your work and find a great place to display your wood carving!
For more whittling guides and information, check out my One Stop Whittling Resource Page for more details!