This spooky ghost whittling project is perfect for beginners who want to make a cool Halloween decoration and takes very little time to make. My average times were between 20 and 40 minutes from start to finish.
Here is what you will need to make the Ghost:
- Sharp whittling knife
- 2″ x 1″ x 1″ block of wood
- Pencil
- Leather strop
You can using a larger block of wood if you want to, but it will take longer to whittle.
Before starting, make sure your whittling knife is nice and sharp. It is always a good idea to hone your knife with your leather strop before starting to whittle. If you feel like your knife is starting to dull out while whittling, strop each side 10 to 20 times and continue.
Video Guide
Step 1: Trace the Outline
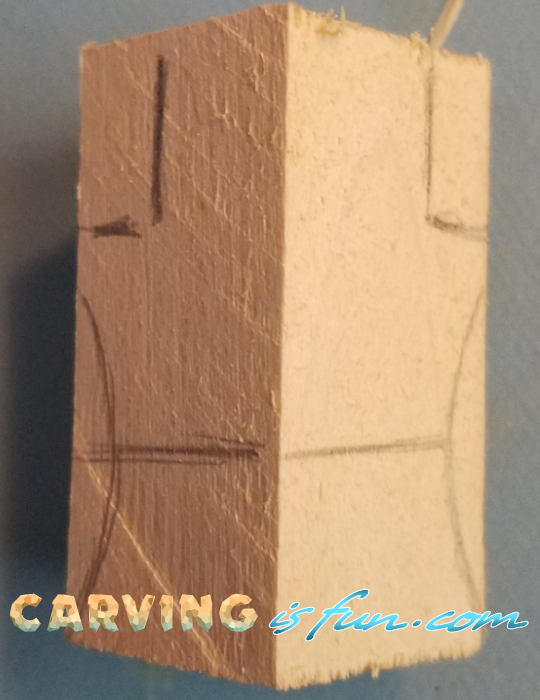
The first step is to trace the outline and make reference marks on the piece of wood. You don’t need to be exact or perfect, but having them close to what is pictured will be fine.
Here are the reference points I drew starting from the bottom up:
- The line across the bottom third that looks like the belt is the center line that we will use as reference to prevent cutting against the grain.
- The curved lines on the sides represent the sides of the ghost
- The lines on the top third represent the tops of the arms
- the two vertical lines are the sides of the head.
Step 2: Cut Out Rough Details
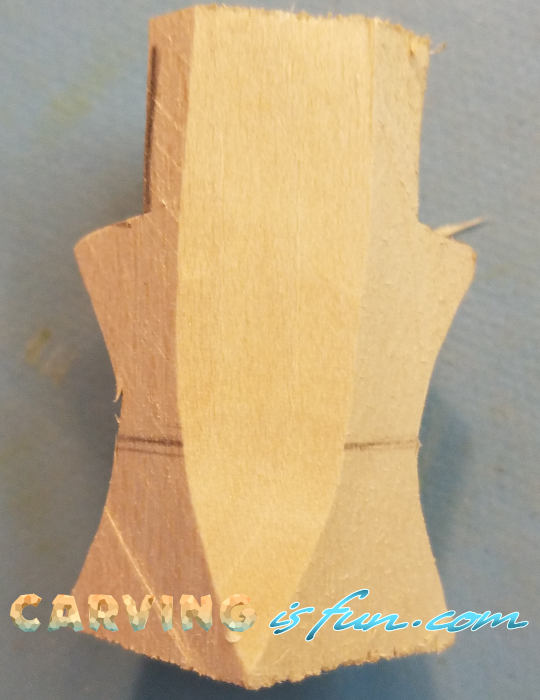
To start, we are going the create the sides by making a sweeping cut following the lines we made on the sides to that center belt. We don’t want to cut past that center belt and start following the line back out of the wood or we risk splitting the wood. So cut in from both the top and bottoms to the line.
Then we want to block out the head. Make a series of stop cuts and start splitting the wood from the top down to the stop cuts as shown.
Finally, make a sweeping cut from the bottom front tip of the block to the top as shown.
Step 3: Take in the Sides
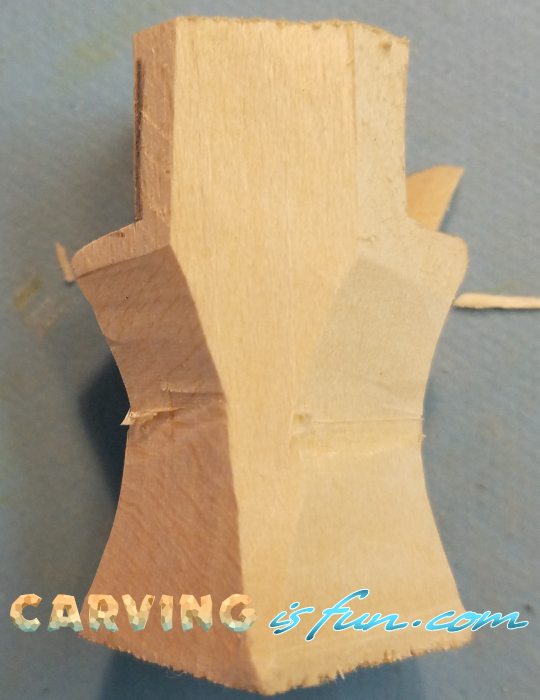
Now the rough shape is defined, lets start taking in the sides.
Using the same method to rough out the sides of the ghost, do the same sweeping cut towards the belt and make the waist more concave in shape.
Step 4: Define the Arms and Round the Body
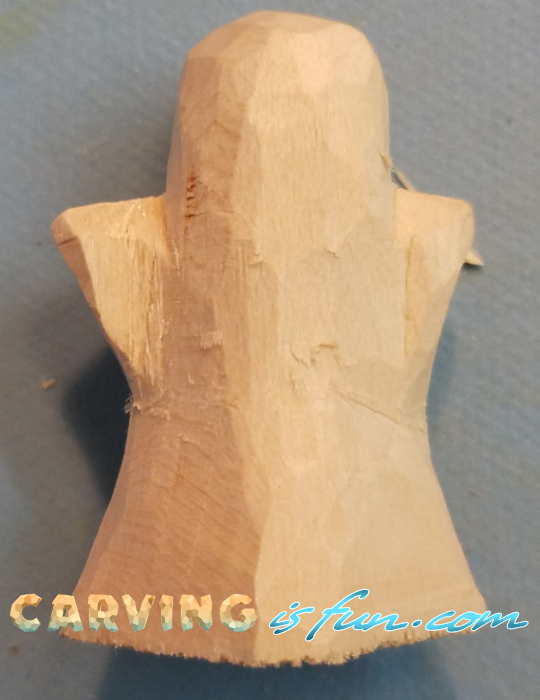
From this point, it becomes pretty simple as most of the work is already done. To define the arms, just make a cut from the front and go back towards the arms and then come back in at a 90 degree angle to define the arms.
Then you just need to round out the head and smooth out the ghost.
Step 5: Add the Tail
From here, remove any chips and clean up your work a little. If something looks off just smooth out the area and try your best to balance everything out.
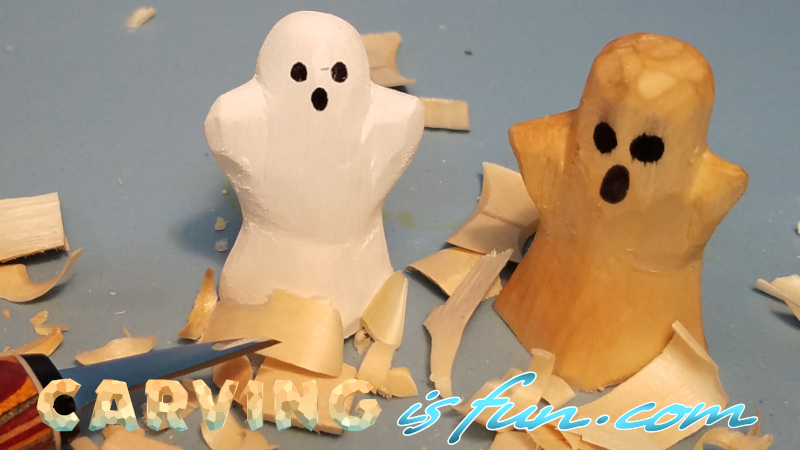
Feel free to add eyes and a mouth to your wood carving and add paint as desired.
For more whittling guides and information, check out my One Stop Whittling Resource Page for more details!