I have been whittling since I was in Boy Scouts, when I found the simple act of shaving chips of wood off of a stick was enough to keep me occupied. Sometimes, instead of going into a project with a plan, I just carve random shapes to see where the piece takes me.
You don’t have to be a skilled craftsman or have a large selection of tools to start whittling. All you will need is: a few basic tools, some wood, and a place to start whittling.
Lets go over these tools and supplies you will need to get started.
What You Will Need
The best part about this hobby is that you don’t need very much to get started. You may already have all you need to start whittling in your house right now!
All you will need to start whittling is a good quality knife, some wood, something to keep your knife sharp, and something to protect your fingers from nicks and cuts.
If you don’t have these tools, you can purchase everything you need without spending a fortune. Lets go over these items in more detail.
A Sharp Whittling Knife
Because your knife is the most important tool in your whittling toolkit, it pays off to invest in a quality blade. A low-quality knife will make it harder to produce clean cuts and carvings as the blade edge dulls faster.
You will want to use a high carbon steel blade or a knife with a Rockwell Hardness between 58 and 62. Knives in this range have a perfect balance of edge sharpness retention without being too brittle.

There are a bunch of different knives on the market to pick from. Some are fixed blade knives for a more sturdy and controlled grip, while others are folding knives that are perfect for camping and whittling on the go.
You can whittle with any knife you feel comfortable with, but here are my favorite knives that I recommend for beginners, based on their affordability and quality.
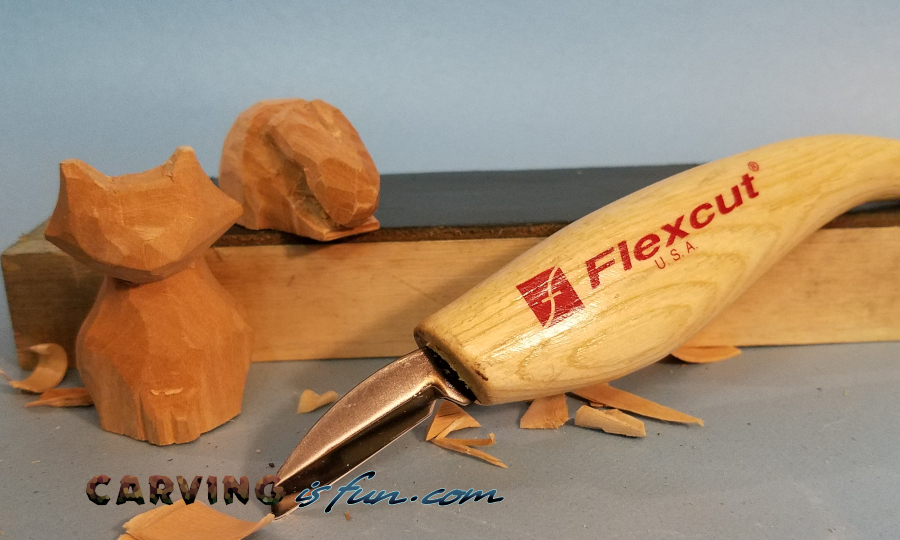
– FlexCut Cutting Knife
FlexCut makes quality wood carving tools and whittling knives that are perfect for beginners. I have a bunch of their tools and have found them to be of better quality than all other brands I have used in the same price range.
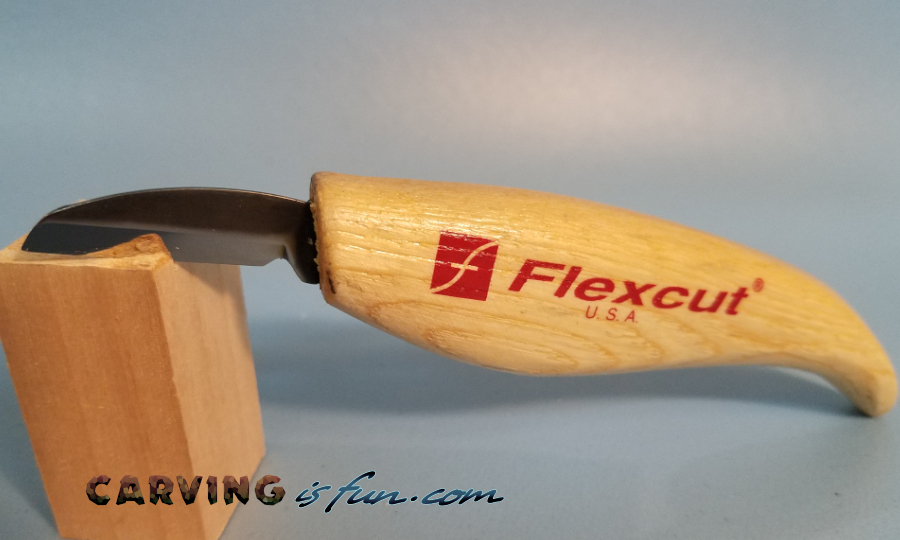
FlexCut’s Cutting Knife (Model Number KN12) is an excellent choice if you only want to pick up one knife. It has a very strong and sturdy tip, comfortable handle, and comes honed razor sharp for immediate use!
You can pick them up for a great price online, click here to check out current prices on Amazon.
For my full review on the FlexCut Knives, click the link below:
https://carvingisfun.com/flexcut-review/
– Opinel No. 7 Carbon Steel Folding Knife
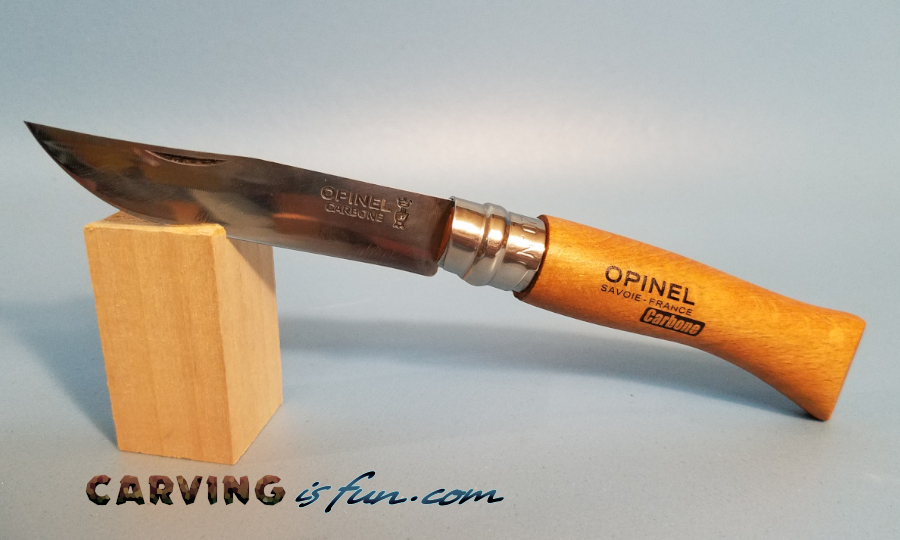
If you are camping or like to carry your knives with you, a folding knife is usually the best option (I carry a few every day myself.) If you want a reliable folding knife for whittling at an amazing price, look no further than Opinel’s Carbon Steel Folding Knives.
These knives come with a nice and thin, high carbon steel blade that makes cutting through wood a breeze. Plus, with its simple and highly-effective blade lock, you don’t have to worry about the knife folding up on your fingers. The lock is so good that it handles like a fixed blade knife.
If you want a different size, I recommend getting no smaller than a No. 6 as the smaller sizes don’t come with a blade lock
You can pick these up for a steal on Amazon, click here to pick one up for yourself!
For my full review on Opinel folding knives, click the link below:
https://carvingisfun.com/opinel-carbon-steel-knife-review/
– Morakniv 120 Wood Carving Knife
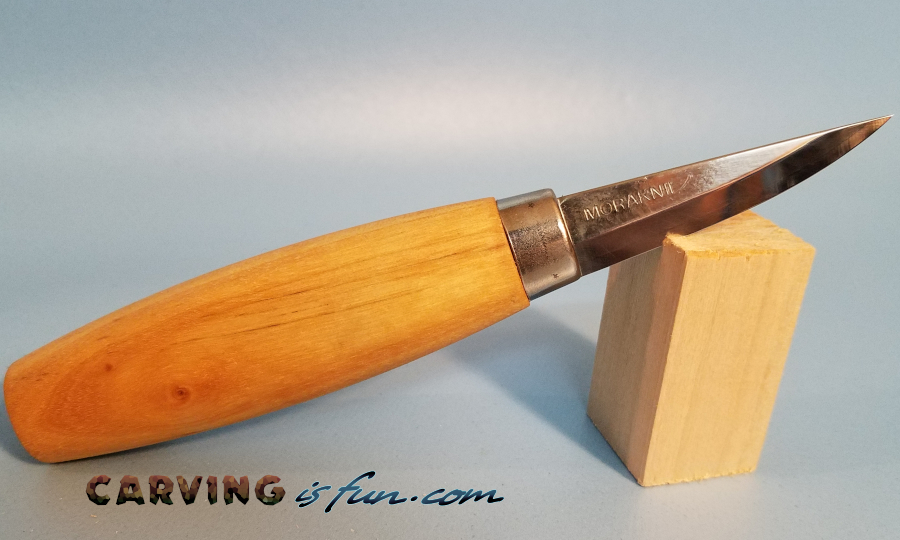
The Mora 120 is a perfect all-purpose whittling knife. It comes with a super comfortable handle, a well designed blade, and solid construction. If you are going to be working on medium to large whittling projects, this is the knife for you.
One of the things I like about this knife is how sturdy it feels, even when applying a lot of pressure. I have no worries when carving away at larger pieces of wood and feel like I can put some force behind the blade as needed.
Morakniv also makes a longer version, the 106, but I find it to be a bit more unwieldy for adding details and small cuts. The 120 is my ideal choice between the two.
These knives are quite affordable and can be found very easily online, click here to check the current prices on Amazon and pick one up today!
For my full review on the Mora 120, click the link below:
https://carvingisfun.com/mora-120-knife-review/
Wood to Whittle
The next and most important thing to find is some nice wood to work with. There is a bunch of wood to choose from, but there are only a few that I suggest for whittling.
A lot of wood you may find – like oak -is exceptionally difficult to whittle and will will quickly dull your knife. Others – like balsa – are just too soft and won’t allow you to make fine details without deforming the block itself.
Options like basswood and green wood are more enjoyable to whittle and will make your experience that much better! Lets go over what they are and where to find them below.
– Basswood

My favorite wood to whittle is basswood as it is soft enough to whittle, hard enough to sculpt fine detials, and has a consistent wood grain to cut with (more on that later).
You can usually find basswood in all shapes and sizes, but my favorite supplier is TreelineUSA.com as their stock of wood is of higher quality than other suppliers I have purchased from and is very affordable. Their practice blocks are perfect for beginners and are easy to shape.
– Wood off the Ground and Scraps
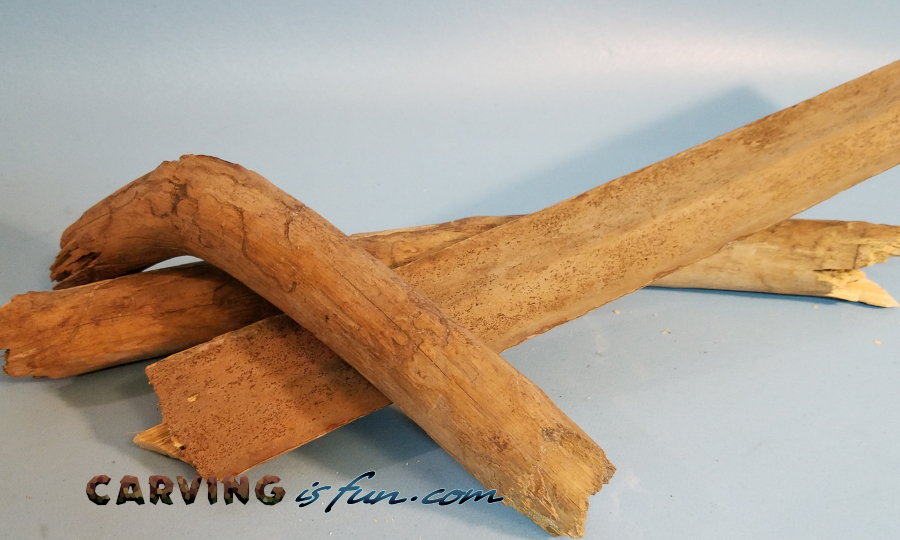
Other great places to find wood for your projects is from your own yard, or even on hiking trails! I have even found nice pieces of wood to carve from other peoples wood scraps on the side of the road. This is a great choice for anyone wanting to get into whittling without spending money on practice materials. If you find your scavenged wood is too hard to work with, click here to see how to make it softer and easier to whittle.
– Green Wood
Another popular choice for whittling projects is green wood, which is the preferred choice of many woodworkers. Green wood is freshly cut wood that still contains the original moisture inside of it. This makes for an easier whittling experience and preferred by many woodworkers. Most wood from stores is already dried, and can be harder to work with.
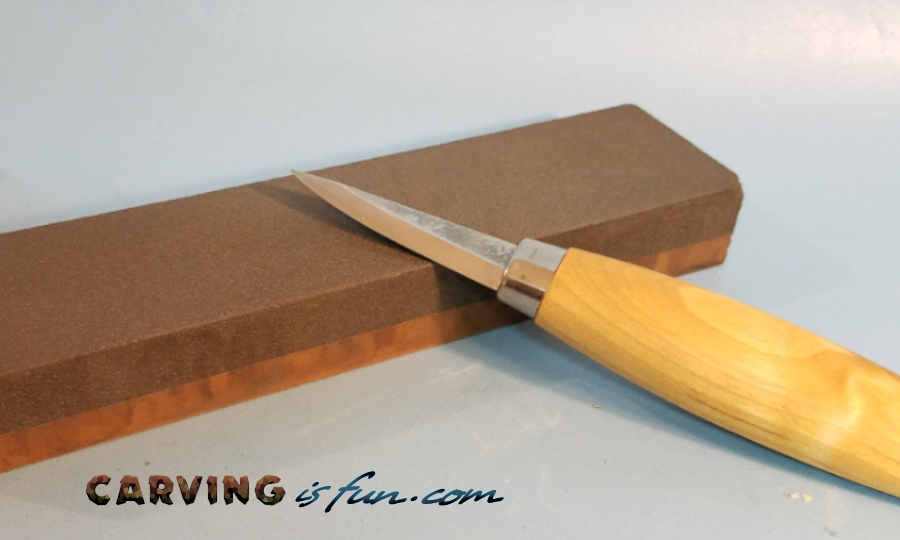
Sharpening Tools
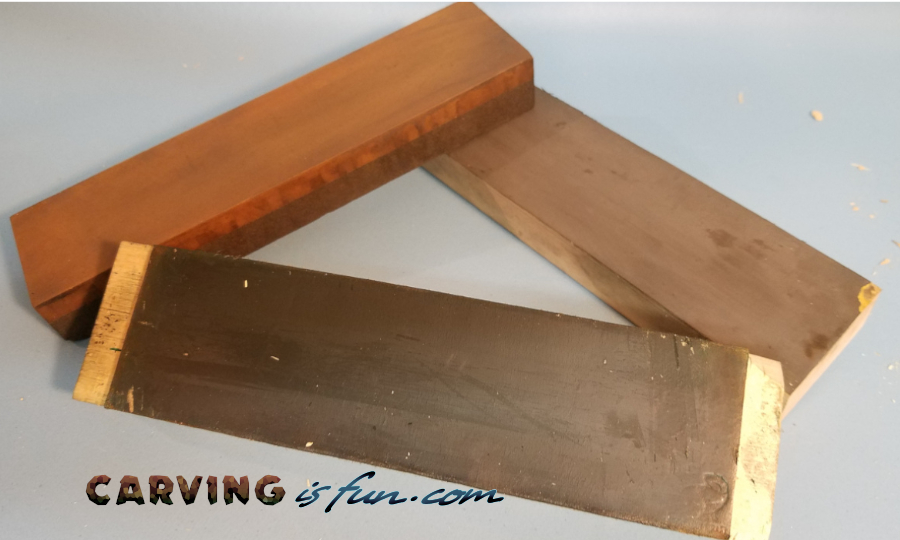
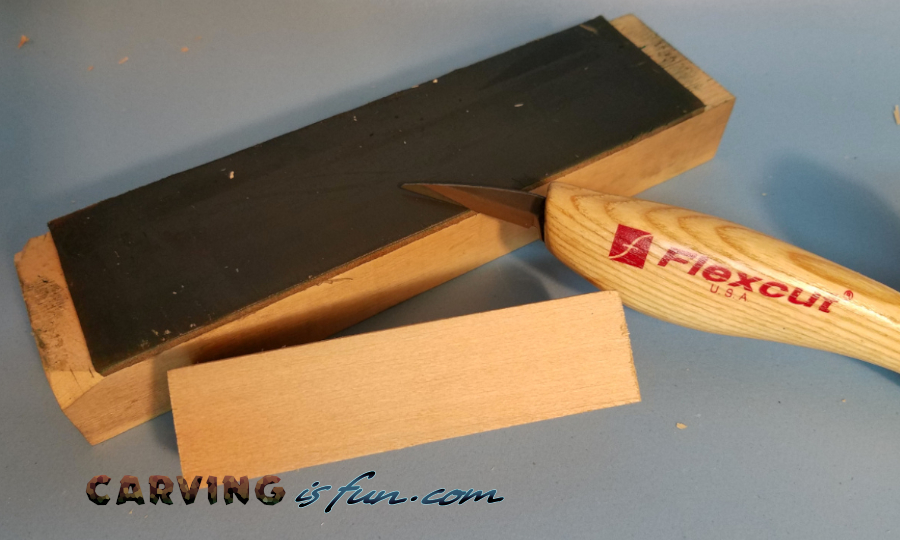
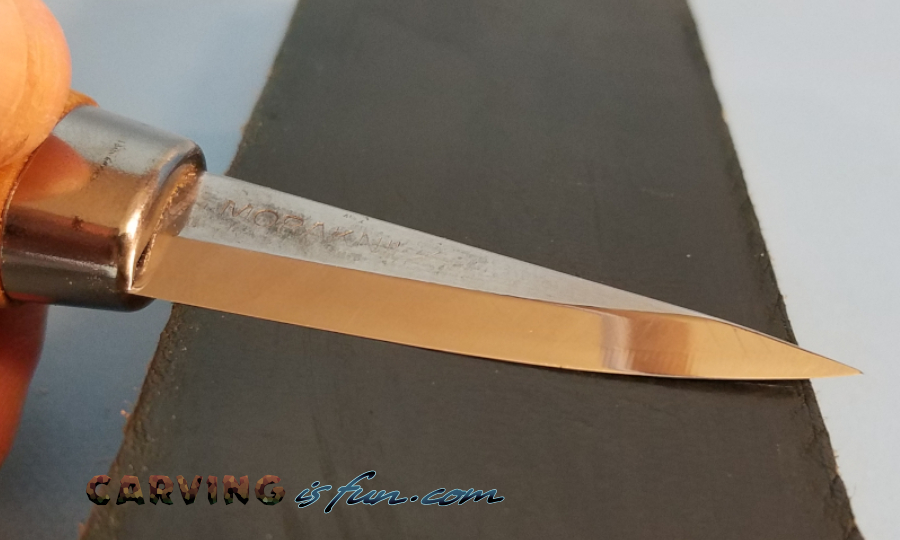
In order to keep your whittling knife nice and sharp, you will need the appropriate sharpening tools. You won’t need to buy a wide variety of tools or to spend a fortune to get the job done. The three pictured above are all I use for maintaining my whittling knives
The three sharpening tools I use are: a leather strop with polishing compound, a two sided sharpening stone, and sandpaper. You don’t need anything fancy at all, especially if you buy a high quality knife to begin with.
– Leather Strop
A leather strop with polishing compound will be your go-to tool for honing the blade. Of all the sharpening tools I own, this one gets the most use. If I need to restore a the super sharp edge on my whittling knife, 99% of the time this is what I use.
Leather strops are used to help re-align the cutting edge on your knife and remove small rolls and wires left over from a sharpening stone. They become even more effective when you apply polishing compound to the surface as it will allow the strop to remove a thin layer of metal with each pass while polishing the cutting edge.
Any old piece of leather will do, so put that beat-up leather belt that you don’t use anymore to good use! Just hold the leather flat or glue it to a piece of wood, and start stropping your knife!
– Sharpening Stones
Sharpening stones are handy for reforming chipped and damaged blades. If you take care of your whittling knives and don’t drop them, you may not need to have a stone at all.
I have been using mine lately as quite a few manufactures don’t send their knives sharp and ready to use. To avoid having to form the edge on your own knife, make sure you buy a quality knife that comes pre-sharpened!
My ideal sharpening stone will have a course side with 400-600 grit and a fine side with 800-1000 grit. Both water and oil stones will get the job done. (I personally use an old oil stone my father gifted to me, but I have also used water stones with great success.
If you find that you need a stone, you can use any type you’d like. However, if you don’t want to spend the money on one, you might want to look into the next option: sandpaper.
– Sand Paper
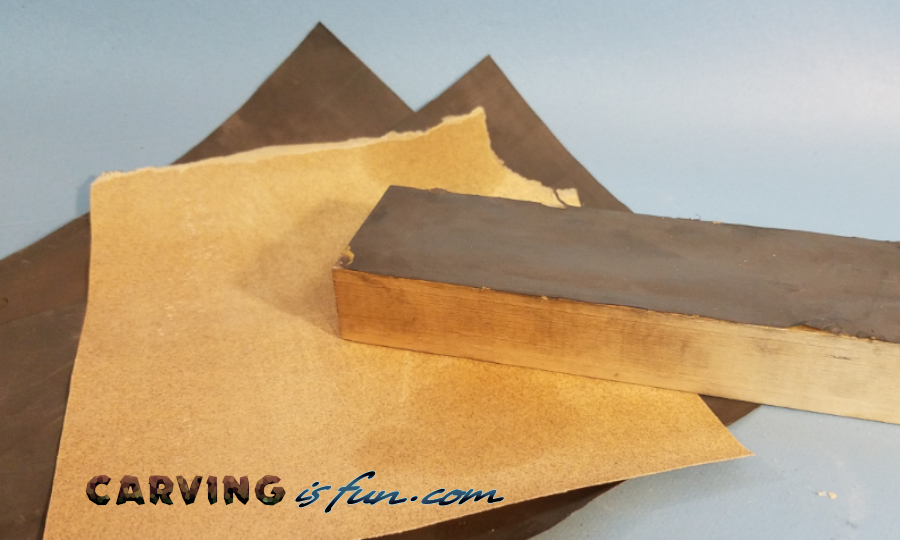
If you want to save some money, using wet/dry sandpaper can also get the job done. Matter of fact, I use a sheet of 1000 grit sandpaper glued to a wood block more often than my stone!
The reason why I specified a difference between wet and dry sandpaper is twofold. Wetting the sandpaper keeps the process cleaner while also prolonging the lifespan of your paper, since it prevents the metal dust from your knife from sticking in the grit.
Safety Gloves and Finger Guards
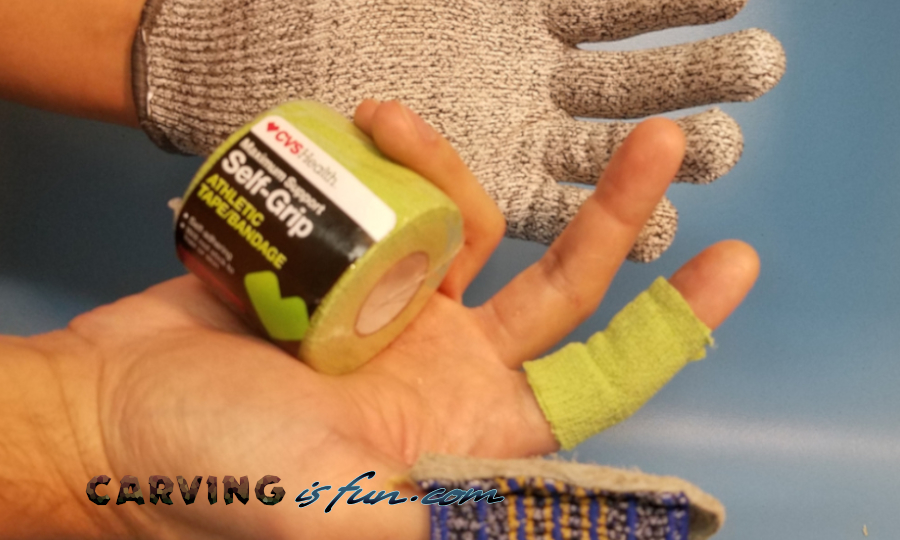
At the beginning you may think that you don’t need to wear any finger protection when whittling. I see the “pros” do it all the time, but they can get away with it because of their years of experience.
I am not perfect and every now and then will get completely focused on the wood, forgetting where my fingers are. It only took me about 10 minutes into my first serious project to realize that I need something to protect my fingers.
If you want to see all the different types of gloves that are available, click here to see my article comparing several different types of gloves. For the sake of convenience and brevity, I’ve included my top two recommendations for beginners’ glove types below.
– Cut-Resistant Gloves
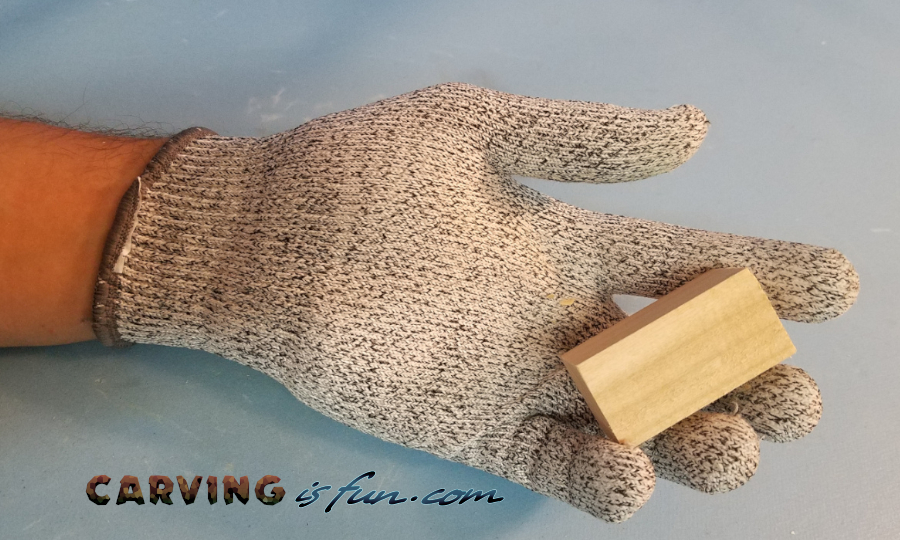
A basic and cheap cut-resistant glove is perfect for a beginner just starting out. They are highly affordable, comfortable to wear, and will protect you from most cuts (but not from pokes, so keep that in mind!)
These are available almost anywhere cutlery is sold and can sometimes be cheaper than a box of band-aids. If you want to pick one up yourself, you can grab the one pictured above on Amazon by clicking here.
– Athletic Tape

One of the finger protectors I use the most is your basic self-adhering athletic tape. These are basically like an ace wrap that sticks to itself, making it easy to wrap the fingers you want to protect. Plus, I can slip the bandage on and off for future use.
You can find these just about anywhere medical supplies are sold and even in some sporting sections. All I had to do was walk down to my local convenience store and pick up a few rolls.
How to Keep Your Whittling Knife Sharp
Now that we’ve covered the tools you’ll need to maintain your blades, let’s talk about the process of sharpening your knives. This is extremely important for both your safety and your overall whittling experience. A dull knife will require more force to cut, which puts you at a higher risk of being cut as the knife exits the wood.
Keeping your knives sharp is quite easy to do, and even relaxing! My wife often says I like sharpening my knives more than I like whittling, and she might be right! The task is methodical enough to quiet your mind, and the end results are very satisfying.
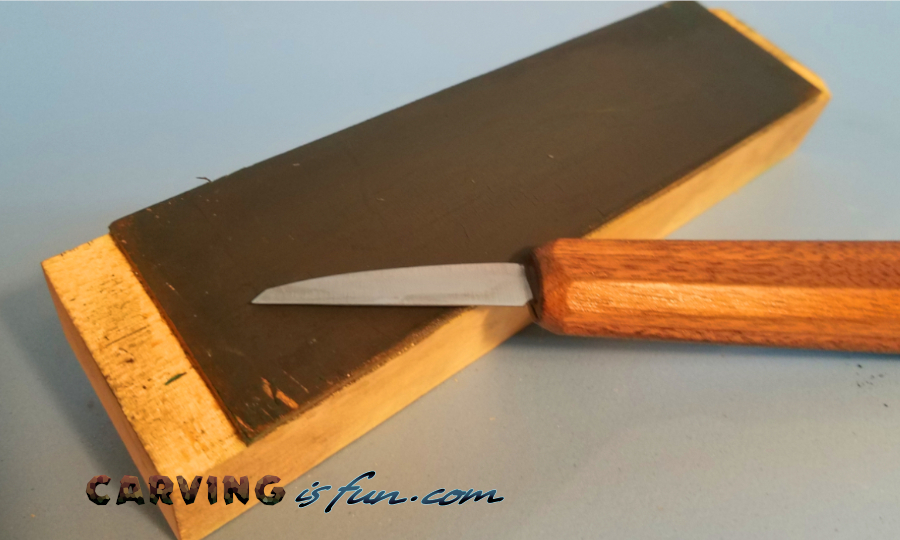
How to Use a Leather Strop
Your leather strop with polishing compound will be your go to sharpening tool. It took me several years to start using them but now that I do, my knives have never been sharper.
If you have a piece of leather to use for your strop, you will want to affix it to a hard flat surface like a block of wood. I would recommend gluing the smooth surface to the wood with the rough side sticking up. The rough side accepts the polishing compound you will be adding easier than the smooth side.
Then all you have to do is take your polishing compound (either green or FlexCuts yellow) and rub it in evenly like a crayon on the leather surface. You can heat up the compound a little with a hair dryer or heater to make it easier to spread, but I have found just rubbing it in with your finger or even stropping a little with a knife will push the compound into the leather fibers.
Make sure you strop the knife’s cutting edge flat to the leather and slide the blade so you aren’t cutting into the leather. For reference, look at the picture above and imagine the knife moving away from you. You don’t need to apply a lot of force to the knife, but just enough to keep it flat to the leather.
Maintain the Edge On Your Knife
While you are whittling, you will want to make sure your knife edge is still sharp. Simply re-honing the blade on your leather strop every 20 – 30 minutes will go a long way to keeping your knife sharp and your cuts smooth.
Once I have gotten a razor edge on my knife, I don’t find the need to use any other sharpening tool other than my strop to maintain the blade edge. There isn’t any real need to significantly reform the cutting edge unless you damage the blade.
Learn To Cut With The Wood Grain
Now that you have a sharp knife, all the tools, and protective gear you need, let’s start whittling! A highly useful tip for whittling for the first time is learn how to cut with the wood grain.
Pushing your knife through the wood grain incorrectly could cause the wood to split and take off an entire sections of wood that you may want to keep attached. You can fix it with glue, but that will slow down the whittling process.
Cutting With The Grain
The easiest cut you will make is cutting with the grain. Cutting with the grain means that you are pushing your knife through the wood in the same direction of the wood grain. This makes for a smooth and easy cut with very little to no roughness of the wood.
This will be one of your more common ways to remove wood with your knife and is easier to do with quality wood with no knots, as well as with wood with fine grain.
Cutting Across The Grain
Another common cut is cutting across the wood grain. Cutting across the grain means that you are pushing your knife from the outside in towards the middle of the wood and cutting through the grain fibers.
This can be more difficult, as instead of sliding your knife between layers of the wood grain, you are cutting through each individual layer of wood. In order to do this effectively, you will need a sharp knife to produce a smooth and clean cut.
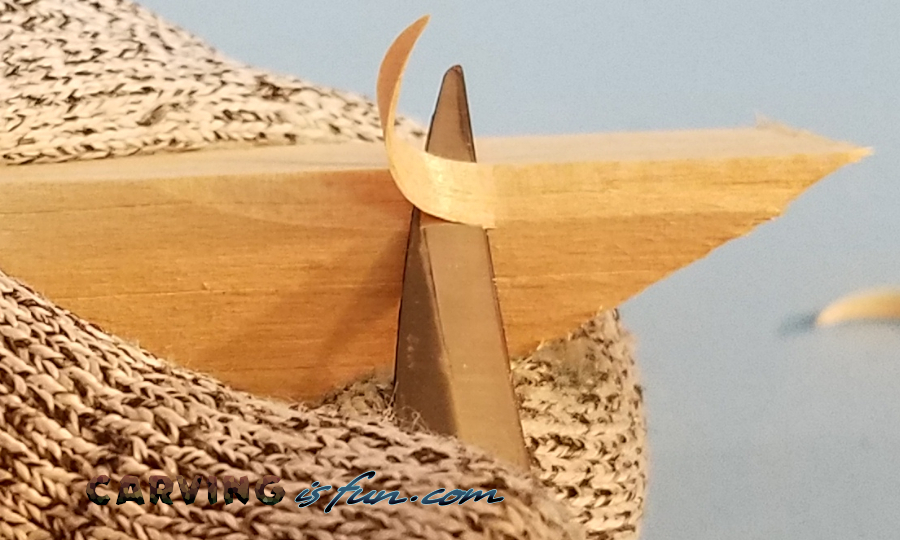
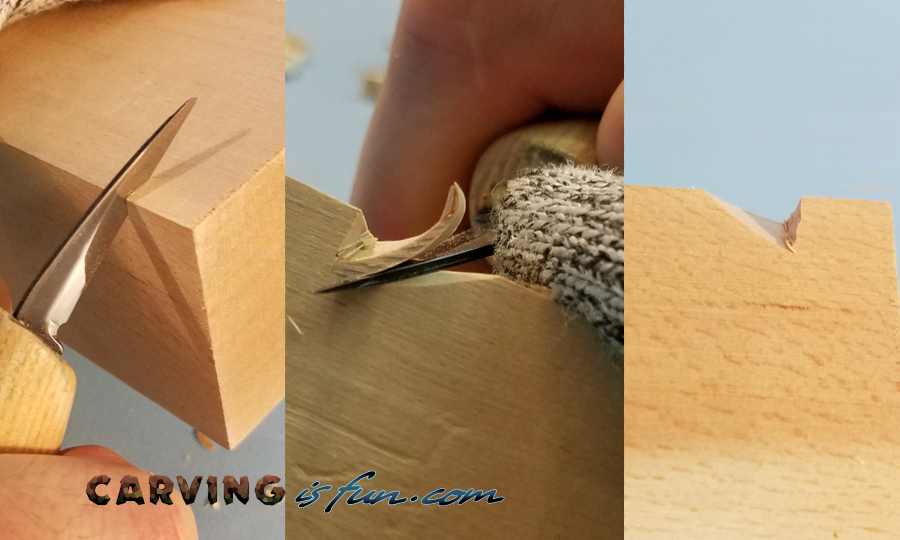
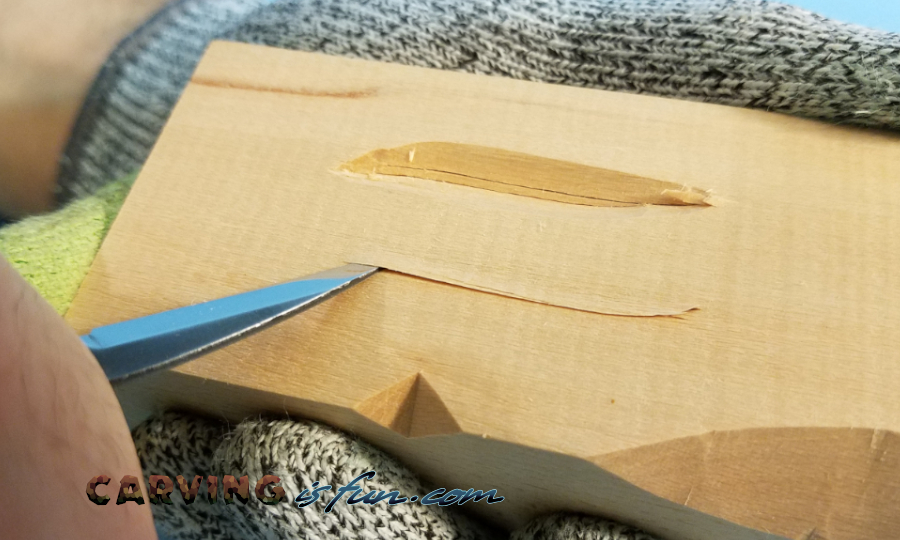
Cutting Against The Grain
This is where things get tricky. Cutting against the grain means that you are cutting from the inner layers towards the outside of the wood, either in a scooping motion or from the ends of the wood inwards with the blade cutting up and out of the wood.
Looking at the picture above, you will see that the wood is starting to split and separate independently from the knife edge. This can cause entire sections of wood to come off that you wanted to stay on and add detail to.
Keeping Track of the Grain
For a beginner, keeping track of how the wood grain flows through the block or stick can be hard. Especially if you are using basic pine wood from the hardware store, since the wood grain is thicker and can change direction.
This is a skill best learned through practice and learning from your mistakes. You will mess up a few times; I still do to this day! You can also just practice cutting by grabbing some scrap wood and seeing what angles you can safely cut into the wood without splitting it.
Basic Cuts to Master
There is more than just taking a knife and starting to cut away wood. By learning and using different cutting techniques, you can easily cut through wood without wearing yourself out and dulling your blades.
For quick picture references, my dominant hand will be holding the knife and my off hand will be wearing a glove and holding the wood.
Rough Cut
This is the most basic cut that just about everyone knows about, but should be used sparingly and only for roughly cutting the wood to an approximate shape.
All you are doing is holding the wood with your off hand and pushing the knife away from you with your main hand. There is very little finesse but allows you to apply force behind the blade. Just be aware of where the knife is going so you don’t hurt yourself.
Push Cut
The push cut will probably be your go-to cut for most whittling projects. You will hold the wood with your off hand and push from the back of the knife with both thumbs on your right and left hand.
By pushing the back of the blade with your thumbs, you can add more control to your cuts while reducing fatigue in your main cutting hand.
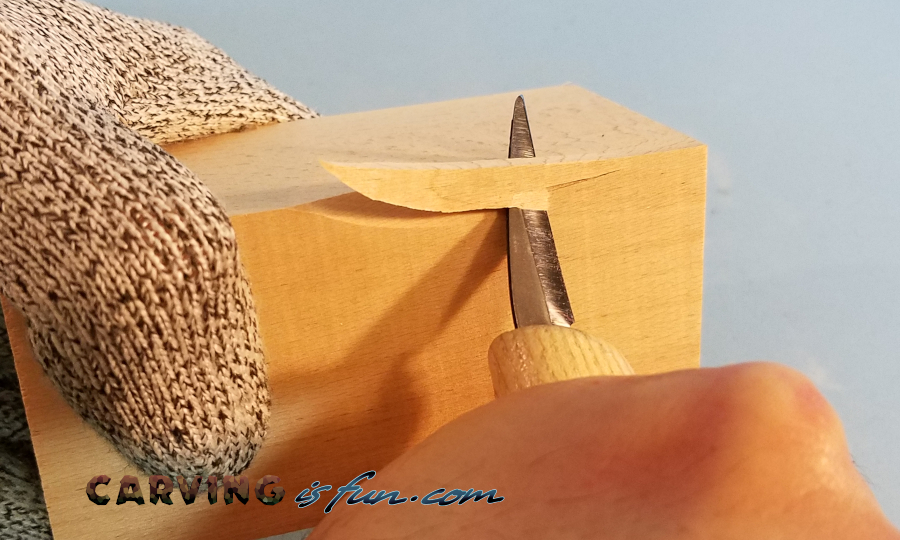
Sweep Cut
The sweep cut is just like the push cut but with a slight twist, literally. Hold the wood and knife like you would with the push cut, but instead of pushing the knife in a linear path you will be adding a slight arch to the cut.
You will start off cutting into the wood between a 90 degree and 45 degree angle, then as you are pushing into the wood, rotate the knife so that it returns to 0 degrees and on the same plain as the wood as shown in the picture above.
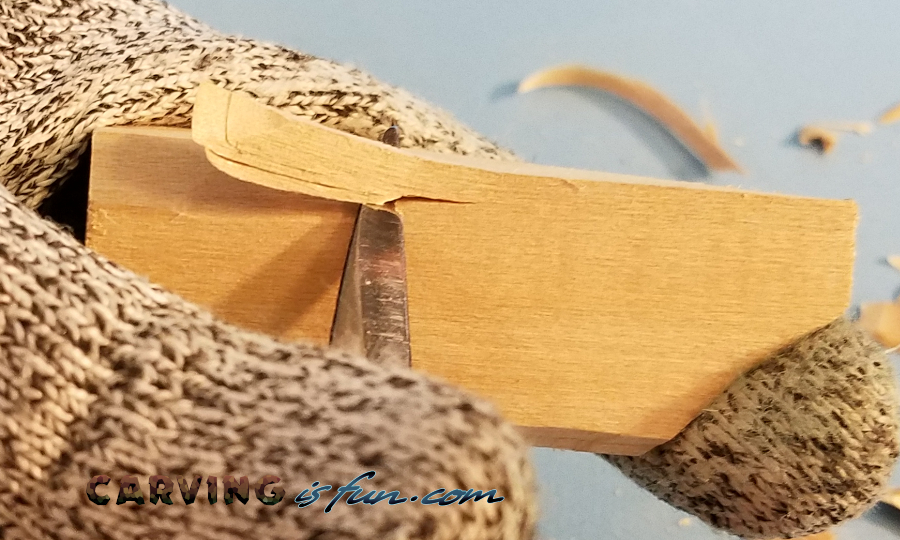
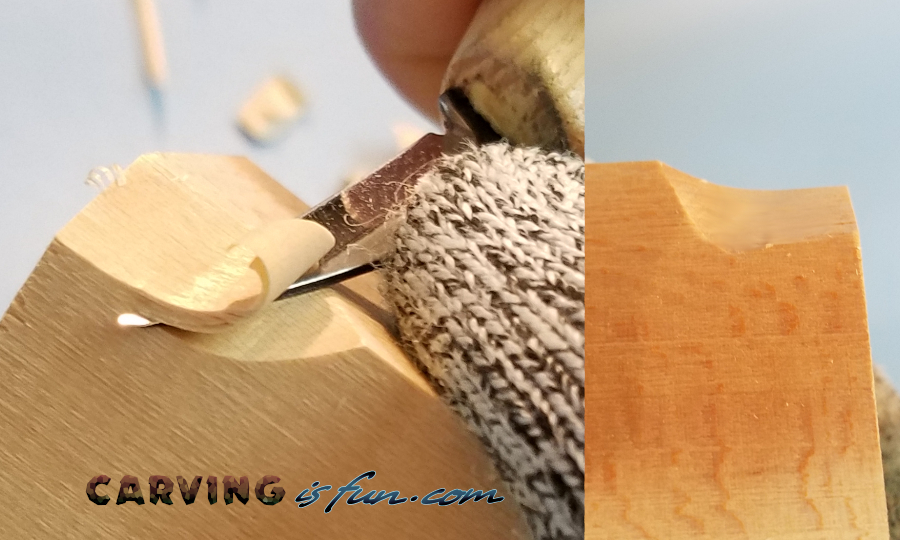
Stop Cut
The stop cut is useful if you want to add a push cut in the middle of your wood carving but stop at a precise point.
In order to create a stop cut, just push your blade directly into the wood at a 90 degree angle to create a simple cut (you may have to rock the blade back and forth). Then perform a push cut right up to that cut you made, this will allow the sliver of wood to come off and separate right at the point you made your stop cut.
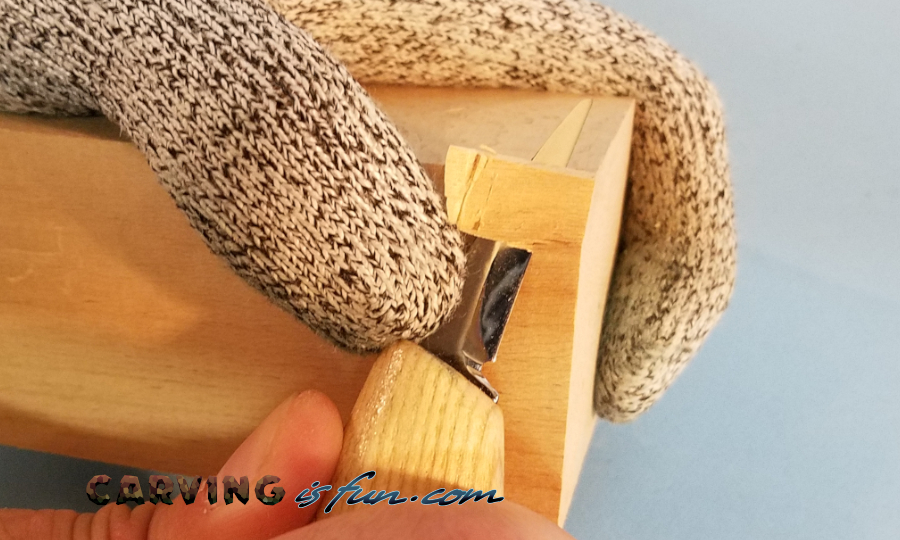
Paring cut

The paring cut is a very common technique that allows you to combine a high level of control with some strength.
First, hold the wood in your off hand, and place your thumb on the end of the wood block with your knife where you want to start the cut (as shown in the picture above.) Then, squeeze your hand together, drawing the knife into the wood and towards yourself, cutting all the way through the wood (or to a stop cut if you wish).
If you are cutting all the way through the wood, it is recommended to wear a thumb guard to help prevent any nicks and cuts from the knife.
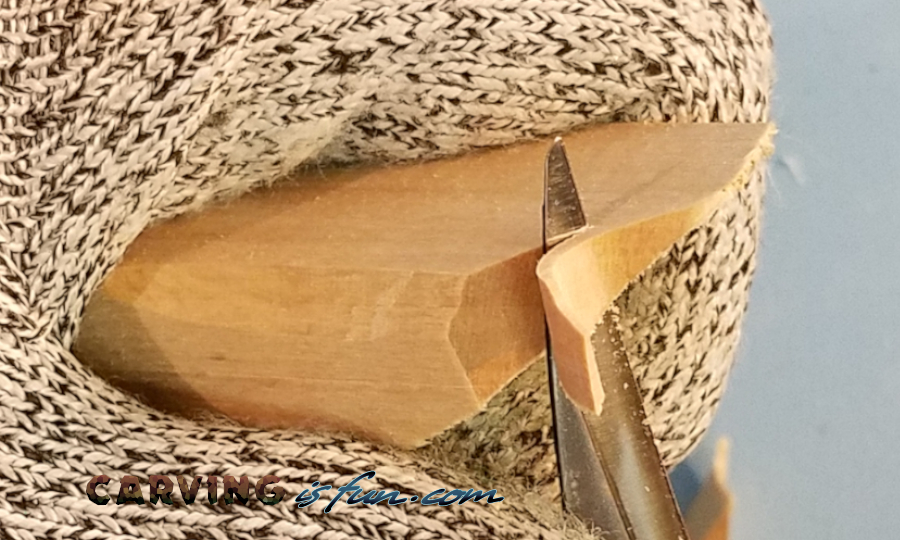
V-Cut
There are two different types of v-cuts that I have seen. One, and the more common way is cutting a “v” shape along the edge of a block of wood. The other is by carving a gouge or trench along the side of a block of wood.
– On the Edge of the Wood
This version of the v-cut cut is very simple and is essentially two stop cuts intersecting each other. You cut into the edge of the wood at about a 45 degree angle (or any other angle you want) and make another cut that intersects the first cut you made coming in from the opposite direction.
This gives you a great surface to make things like faces or details to clothes.
– Down the Side of the Wood
The second version of the v-cut is sometimes called a gouge cut, but all you are doing is making a small v shaped trench along the side of the wood. It is very similar to chip carving and relies on the same principles.
To make a gouge cut, place your knife tip on the flat side of your wood block and cut into it at a 45 degree angle (or an angle of your choosing) down a line. You can make this line straight or curvy, it doesn’t matter. Then you cut from the other direction at the same angle and intersect your first cut, creating a v shaped trench.
This cut is often used for creating flowing details like hair or ripples in clothing.
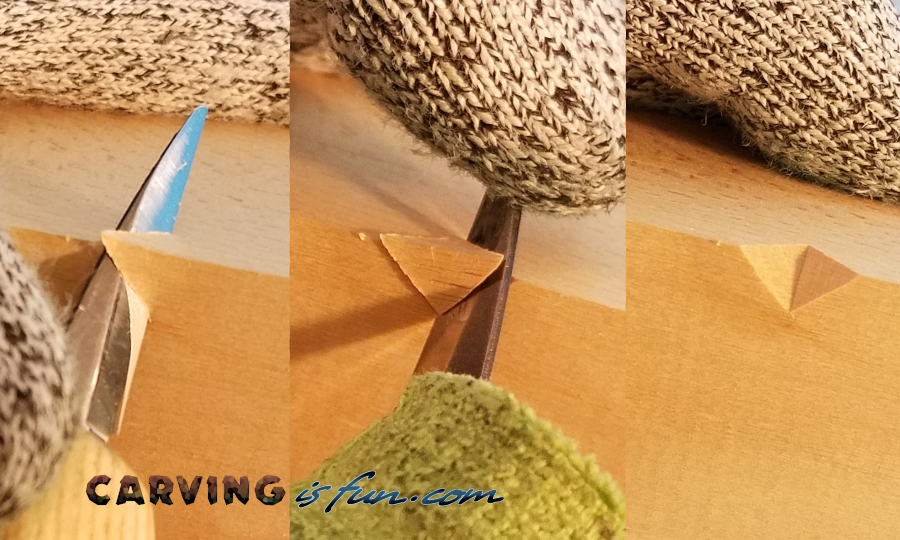
Stab Cut or Pyramid Cut
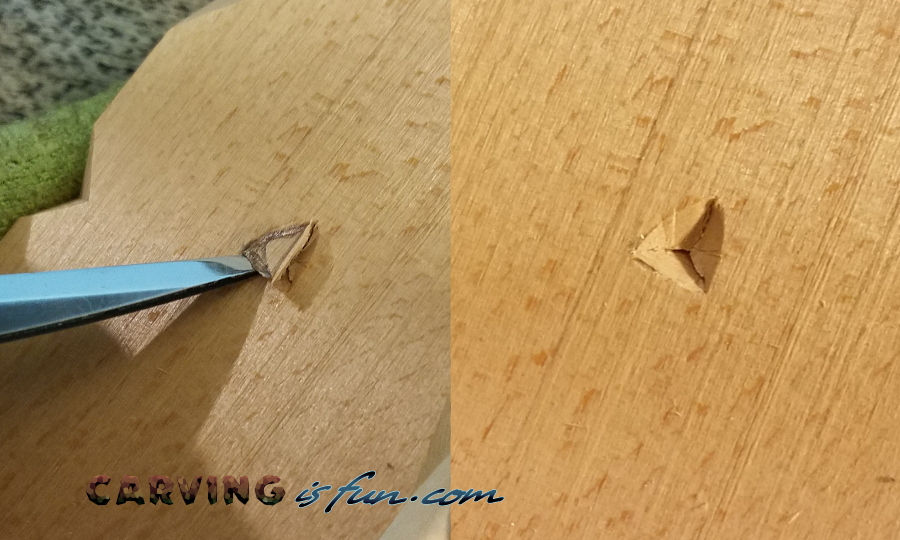
The stab cut is a useful way to remove a small chunk of wood from the side of the wood carving. This is easy to do and only requires you to push your knife into one central point at the same angle.
To do this, it is sometimes best to draw where you want your cut to be, as shown in the example above. Then, push your knife into the block of wood along the line you just made at a 45 degree angle. Repeat this step for all of the sides drawn, making sure to cut at the same angle and depth. If done correctly, a small wedge or pyramid shaped chunk of wood will pop right out.
This technique is very useful if you want to make geometric shapes or eyes.
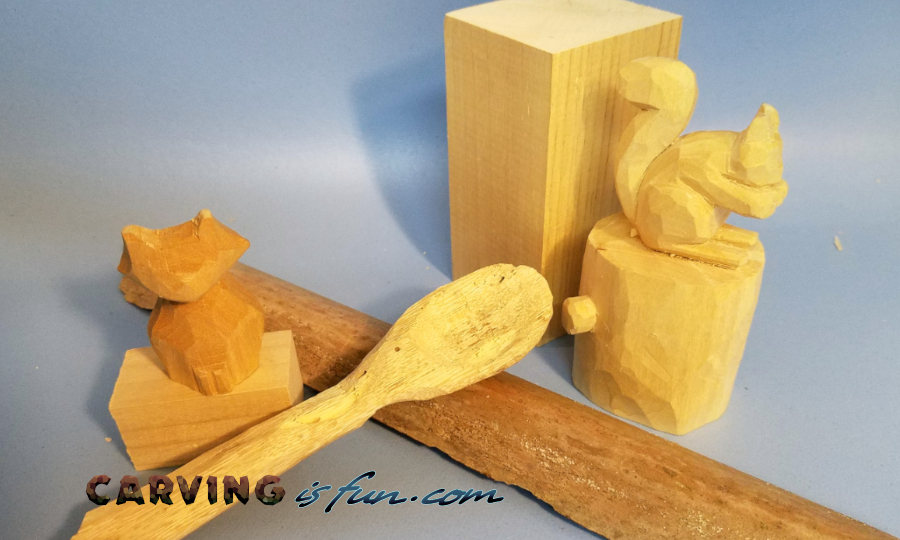
Easy Whittling Projects for Beginners
Now that you have all the tools and understand the basic cuts, it’s time to start making your own creations!
I recommend whittling what you both feel comfortable doing and what you want to make. Personally, I rather make small figures over any humanoid figures. They are more enjoyable and are simpler to make. I don’t even add faces to mine most of the time because I like the simplistic look instead.
Here are some quick and easy whittling projects perfect for beginners:
Quick Wooden Bird
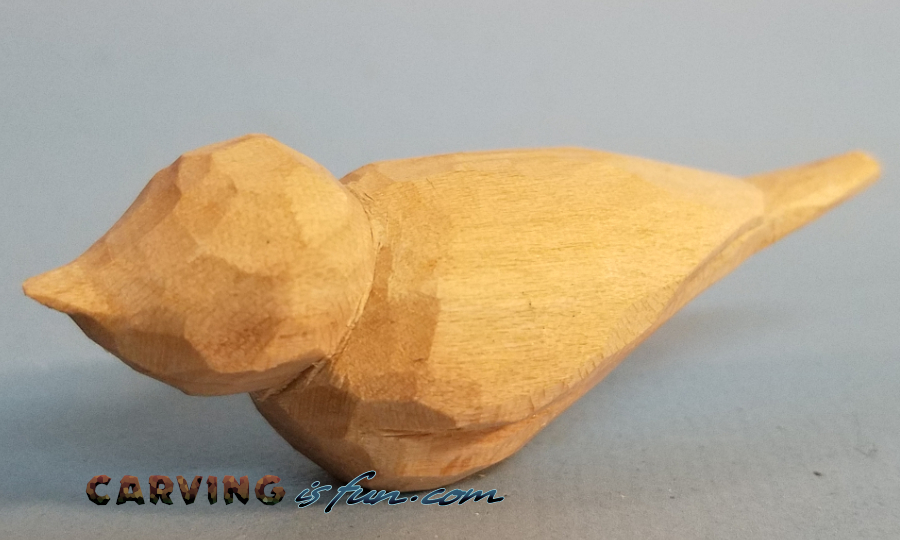
This project will probably be the simplest thing to whittle when first starting out, and you are free to add as much or as little detail to it as you wish. The bird in the picture above was whittled out of a 4″ x 1″ x 1″ block of basswood, roughly cut in half at a 45 degree angle.
Easy Wooden Cat
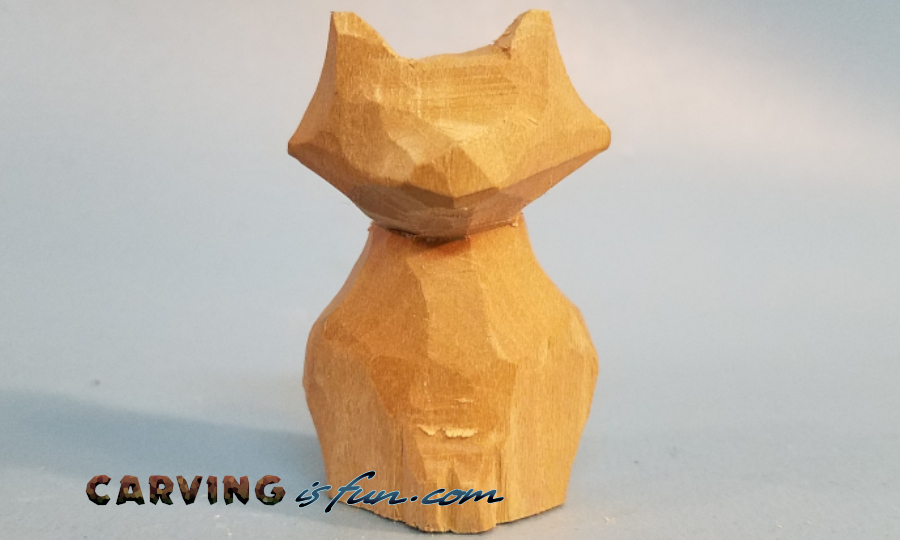
Cats are fun to whittle, as they have more of a simplistic shape to them and are quick to make. The cat in the picture above was whittled from a 2″ x 1″ x 1″ block of basswood and only took 20 minutes for me to make.
Simple Wooden Bunny
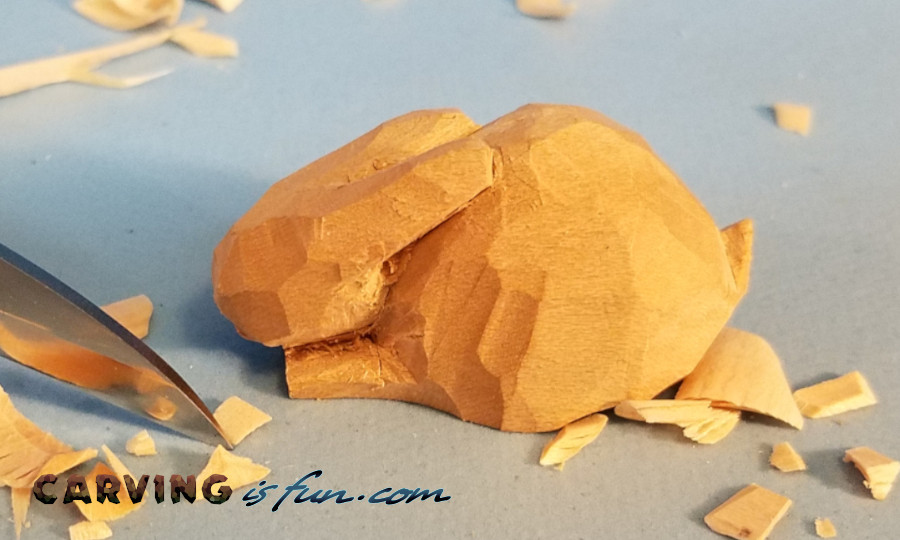
This little bunny is one of my wife’s favorite small scale wood carvings I have made. It is super easy to make and was made from a 2″ x 1″ x 1″ block of basswood, taking about 20 minutes to make.
For more detailed information on each section feel free to check out my One Stop Whittling Resource Page for extra information and tool reviews.