If you’re reading this, you’ve probably already attempted pyrography and something went awry. That’s why you need some tips, right? Or maybe you’re super excited to learn and would like the crash course on how to get started via a short list. I totally understand!
I’ll give you beginner pyrography tips that span from the start to the finish of your project. In this post, I want to impart a few tricks, like what tools you may want to have, how to use those tools, beginner-friendly woods to use, and different resources.
Keep Long Hair Tied Back
There are two old sayings everyone should hear at least once:
- “Don’t play with fire”
- “Don’t tempt fate”
This tip is a combination of the two. If you have long, luscious hair, you should NEVER tempt fate while practicing pyrography by having very flammable locks anywhere near the wood-burning tip.
Long hair can absolutely have the tendency to
- Obstruct your vision
- Get too close to the wood-burning tip
- Get caught in every nook and cranny of your pyrography pen
- Sometimes its just annoying and can ruin your concentration
If you don’t have a hair tie or wide headband to pull your hair back, rubber bands also work in a pinch and are sometimes a bit more available if you’re in the shop.
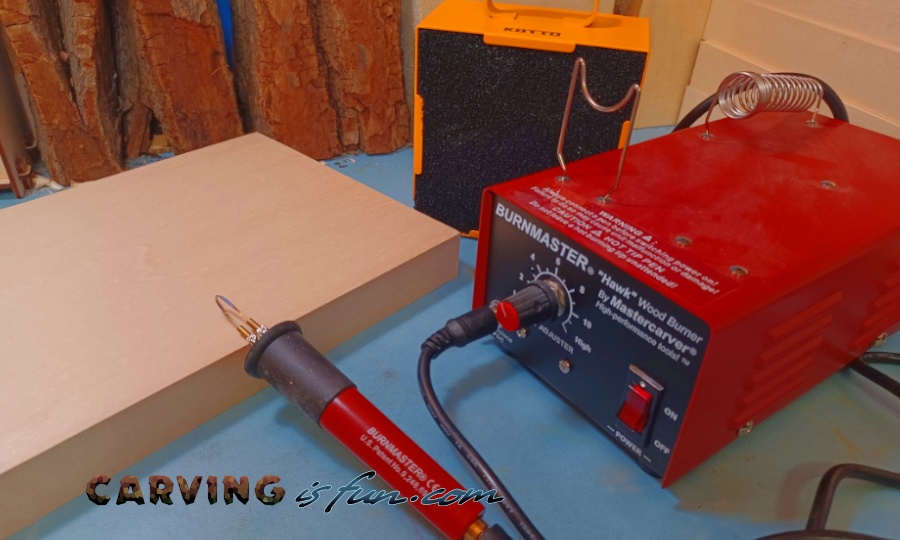
Use a Quality Wood-Burning System
As someone who needs to get a hang of pyrography techniques, you may not want to sink your money into the most expensive premium wood-burning system. While these systems are really nice, there are cheaper options that still provide you with a wonderful system that will last you years. What you may actually need is a quality wood-burning system that is affordable and flexible.
I would personally suggest the Burnmaster HAWK wood-burning kit as it provides the user with a massive amount of burning tips as well as pen options and has the power to allow you to apply your art to almost every type of wood on the market. I and other professional wood crafters have praised this particular system because it has everything you need to get started for a moderate price.
A wood-burning kit should come with a wood-burning machine that reliably allows you to adjust the temperature of your wood-burning tips. That’s why I don’t care for the $20-$30 kits that just have the pen that you plug into the wall. The temperature dial will sometimes be on the pen itself which you can easily bump with your hand, or burn yourself trying to adjust.
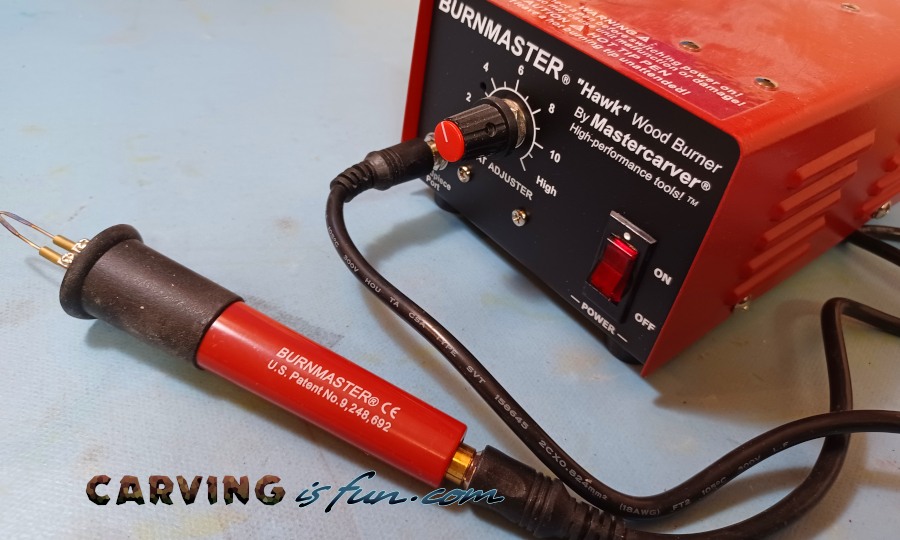
Choosing a Wood-Burning System with Interchangeable Tips
There are a lot of kits to choose from, and it can be difficult to tell one from another, but you don’t want to waste your money! So, how can you tell you have a good kit? A hallmark of a good system is that it has interchangeable tips and/or pens that allow you to create different patterns and are easily replaced.
Most mid-range wood-burning systems have quality-made tips and pens that allow you to swap out tips. Some higher-end systems actually have a switch that allows you to quickly switch back and forth between your favorite tips.
A good feature of the Burnmaster HAWK kit, mentioned above, is it actually allows the user to use tips and pens from other brands and is one of the most universal and adaptable pyrography kits on the market.
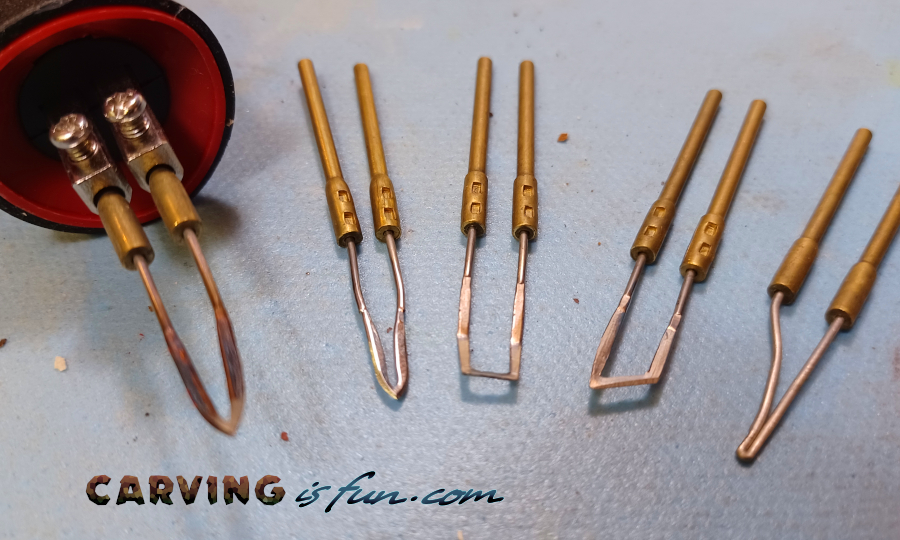
Using Different Tips
When your new multi-tipped kit arrives, shiny and ready to go, the desire to jump in is incredibly strong. That’s definitely an encouraged way of getting started, but many of you are confused about what tip is used for what kind of pattern.
This is where I would encourage you to make a sort of “swatch” board for a quick reference for each tips patterns. Practicing wood-burning techniques with each tip at different temperatures and getting a feel for which techniques come easily to which tip, and which techniques are almost impossible!
Then, with this swatch board, you don’t have to be confused about which tip does what. Be sure to avoid pressing down hard on the burning tips! It only takes a second of lightly pressing the tool onto the surface to get a solid markdown.
I recommend checking out Burnsavvy, they have excellent examples to give you a good idea of how to make your own swatch board.
The best place to start is by practicing with the universal tip first. It can do almost everything the other tips can do and will give you an idea of how to use the system for most of your projects. This point looks like a chisel and is the tip second from the right in the picture above.
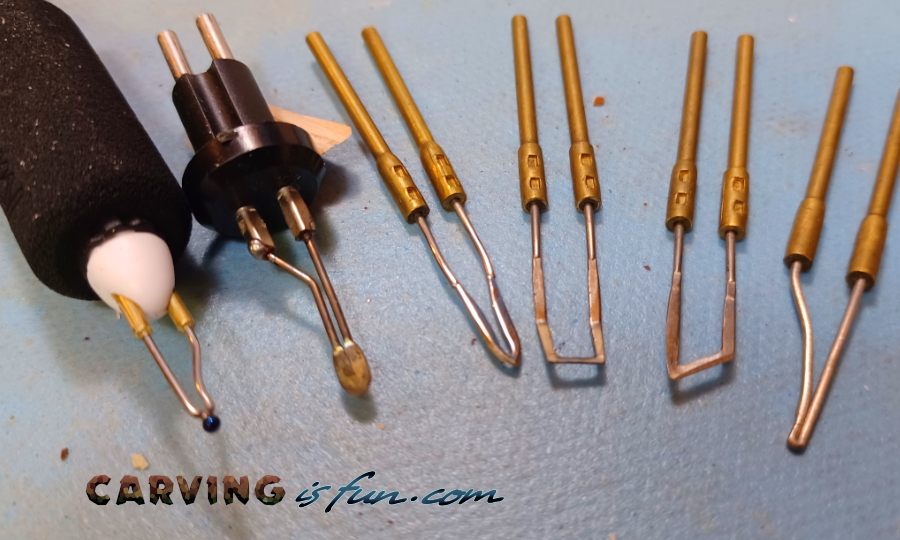
Never Touch Wood-Burning Tips
I know, I know! This seems pretty obvious, but you would be surprised how often this gets us. Why? Because we underestimate the temperature of a tip we were using when want to switch to another tip.
The tips are extremely conductive and will heat up almost instantaneously, so it’s easy to burn yourself even when you know what you’re doing.
How are you supposed to switch tips out?
Different pens will have varying instructions but for most universal style tips all you need to use is flat-nosed pliers with rubber-covered handles, loosen any screws holding the tips in place, hold the tip tightly with your pliers, and then pull away from the pen to get each tip off. This will prevent damage to the wood-burning tips.
You should also have a safe place to place the tips so they are out of the way and dissipate heat. A simple piece of aluminum or even a makeshift tray of aluminum foil that has been folded over several times will help quickly dissipate the heat and act like a heatsink.
I personally do NOT recommend dropping a hot tip into a bowl of water. This sudden shock of cooling will cause stress fractures in the metal and shorten the tips lifespan.
Use Beginner-Friendly Woods
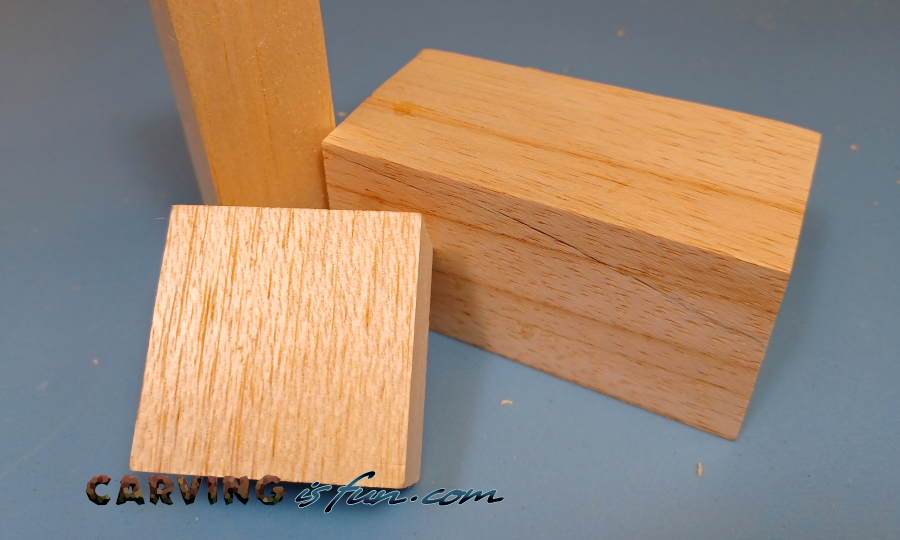
Not all wood options are the most suitable for pyrography. There are certain qualities you want from your wood in order to get the best image you can. Your wood should be,
- Light-colored to show fine details
- Evenly colored for finished projects
- Hard or soft according to the techniques you’re trying to do
Here are some examples of beginner-friendly pyrography wood types, along with their most notable strengths and weaknesses. If several sound good to you, opt for the cheaper to start with.
Balsa
If you are a fresh face to pyrography, balsa wood is a great place to start. It is best for practicing your techniques because of its closed and minimal grain, light color and you won’t beat its softness. It has every quality for perfecting your skills.
While balsa is easy to work with, it is often too soft to add intricate details and is easily damaged if dropped. This wood is best used for simple carving projects for beginners just learning how to manipulate the wood.
Basswood
Basswood has a beautiful even creamy color, is soft enough to add texture while burning, and easily darkens with just about any pyrography setup. Basswood can create great contrast creating beautiful finished pieces of art, this is why the majority use it for wood-burning.
Finding basswood can be troublesome for some depending on where they are in the world as these trees primarily grow in the North Eastern regions of the United states. If you have trouble finding the wood, you can try looking up Linden wood or a similar species in Europe, Lime wood.
Beech
If you want a light-colored but harder wood for a more practical application like handles, utensils, and signs, beech can work well. The only con is that it often has sap in the darker grains that can leak out after burning. Make sure the wood is dry and properly prepped before burning for best results.
Willow
Willow has smooth grains making it easy to burn curving or intricate patterns. Willow also retains its color after finishing instead of getting darker. It can be perfect for when you’re ready to create your beautiful finished product. The downside is that it can be harder to find, slightly harder to work with, and more expensive.
Maple
Maple is a beautiful wood with its minimal grain and light color it is great for finished projects. Maple though is high in hardness, therefore you need to use high heat to combat this. This will require an intermediate to professional-grade wood-burning station.
Woods to Avoid for Pyrography
A master can take a variety of woods and learn how to use their characteristics according to their intended project. However, if there is one type of wood that both novices and masters should avoid, it’s any man-made wood product, such as plywood or medium-density fireboard (MDF).
These might be tempting because they are readily available, but they are the worst to use because,
- They’re rough
- Splinter easy
- Are cumbersome
- Are often made with formaldehyde, causing toxic fumes while burning
Always Prepare Your Wood Surface
While you’re waiting for your pyrography pen to warm up, this would be a good time to prepare your wood surface. Splinters, raised knots, and other bumps or irregularities can make your image look odd when you’re finished, so it’s a good idea to sand new wood pieces to make everything smooth.
Even if you buy pre-prepared wood online, you should carefully inspect each piece you intend to use at the beginning of each project. Keep an eye out for rough spots, darker spots that could contain sap, residue on the surface, and/or dust.
If you do need to remove some minor imperfections on the surface of the wood, you can simply remove most imperfections away with 300 to 600 grit sand paper. Just be sure to brush away all of the dust when you are done!
If there are some minor nicks or dents, you don’t need to sand the entire piece of wood to get everything smooth! Instead, take a damp wash cloth, fold it once to make a decent barrier, and place it over the dents or nicks. Then, take a hot clothing iron and press on the cloth to raise the wood grains. Once the wood dries, use some sandpaper to smooth everything out.
Image Transferring Methods
When it comes to image transferring, there are three methods:
- Stamp
- Iron
- Trace
Stamping is perfect for beginners, so long as the design you want to attempt comes in an ink stamp. You should be able to find tons from craft stores. Once you have an image stamped on the wood with light ink (be careful of bleeding), that’s when you go over the stamped image with your wood-burning pen.
Ironing needs you to print your image on some paper with a toner-style printer instead of an inkjet. Gently iron the image onto your wood with the cotton setting. I recommend stamping instead.
Tracing is where you have your image on a thin sheet of either carbon, photo, or graphite paper. The image is covering one side with a substance like dark chalk, charcoal, or pencil lead. With careful, firm, and precise tracing with a pen or stylus your image will appear on the wood.
For details and some examples of these methods, take a look at this guide for help.
Using Books to Learn Wood-Burning
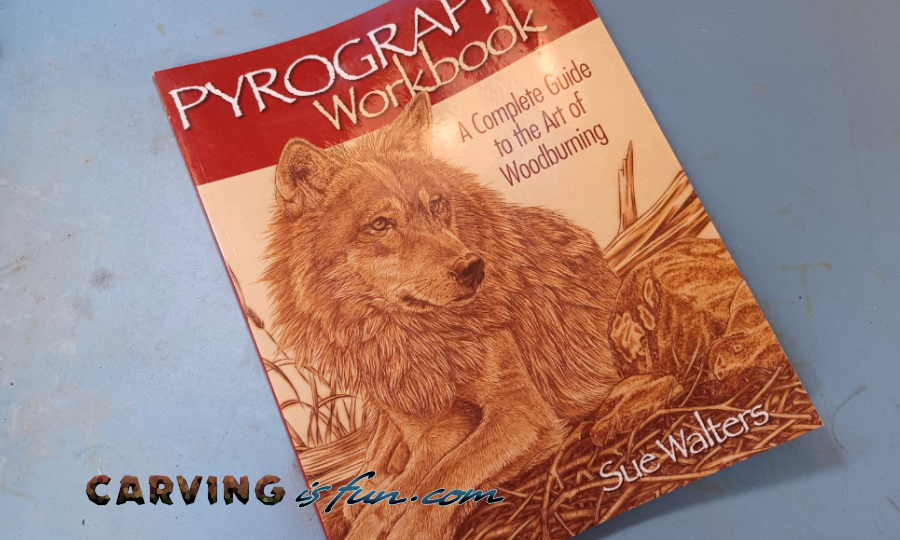
Using books to learn pyrography can really feel like a gamble. What if they don’t have everything you wanted to know? Why shouldn’t I just watch some YouTube videos of what I want to learn?
And yet, on the other hand, books don’t require
- Having to be replayed,
- Trying to find the exact spot in the training video you need over and over,
- Often they can have better angles and better quality photos
When it comes to finding the right books for you, you will most likely need a few different books to help show you everything there is to offer
One book may teach you how to prepare your tools, how to prepare the wood, and teach you the basics of wood-burning techniques. Another book may teach you simpler designs, and another may cover more complicated designs you’re looking for.
Keep in mind you need a solid foundation of pyrography principles and basic techniques to be able to do the more complicated designs. Be patient with yourself. Even Michelangelo couldn’t draw a decent circle at the beginning.
Invest in a Smoke Collector

This is extremely important! None of us are trying to set fire to our wood supply or home, but nevertheless, fumes and smoke inhalation are a real danger in pyrography. Most of us work in an enclosed area such as a designated workshop room, or a garage, but when the weather is cold or hot we close the windows and doors. the fumes and smoke from pyrography can cause health issues.
Whether you’re working In good weather or bad weather, you need to have a smoke extractor on your desk because you are constantly inches away from the fumes. Yes, wood smells good, but the resins within can cause skin and eye irritation.
Some wood fumes are more toxic than others, and the small particles can make heart conditions worse by preventing oxygen from being carried to your tissue.
This is one example of a desk smoke extractor, which should be sufficient at the beginning for small projects.
Conclusion
I know you’ve got this squarely in the bag, but it sure doesn’t hurt to have the advice and expertise of someone who’s been where you are. I hope this small list of tips and tricks did something to help you get a sure footing on your path to pyrography.